Have you ever typed a specific destination into your browser, but are taken to a completely different URL than the one originally typed? Whether you have experienced this or not, it is an example of a 301 Redirect.
What Are 301 Redirects?
A redirect is a method to send users to a different page than the one that they entered into the URL, this specific type of redirect (301) means that it is a permanent redirect. There are other types of redirects such as the 302 or 307, but in this article, we will be mainly focused on the 301.
Although this was not always the case, Google has made it so that any forms of 30X Redirects no longer alter link equity or the pages ranking power. This means that even though your one page has achieved high ranking power; if you use a 301 Redirect, the page ranking will carry over to your new page. However, you have to be careful! If you use 301 Redirects you have to bring users to pages that are relevant to what they typed in the URL. If not, it will be considered a Soft 404. If Google considers it to be a Soft 404, the redirected page will not retain the rankings and traffic of the old page. Google will ultimately remove that page from its index if the page stays as a Soft 404 for too long, so stay diligent!
Why Do I Need 301 Redirects?
There are a few reasons as to why you may want to use a 301 Redirect. One of the main reasons would be attributed to website construction. If you are redesigning your website, often times pages get deleted and forgotten about. An easy fix to these deleted pages is to implement a 301 Redirect. Doing so will make sure your page rankings are not affected with. This can be crucial in making sure your website can run efficiently even when under construction.
Another reason would be if you have changed the branding of your company and need a new domain. In most cases, you still want your previous viewers to know that you are the same company offering the same things just on a different website. Using a 301 Redirect can be very useful in allowing you to transfer all of the traffic from your previous website to the new and improved one.
A third reason why one may want to use a 301 Redirect would be if you are transitioning to HTTPS from HTTP. The 301 Redirects can be used to ensure that only the HTTPS version of your site is accessible by users
How to Set Up 301 Redirects in WordPress
As you may already know, a hefty amount of websites on the internet run on WordPress. If you are in that camp, we recommend using the Redirection plugin. Don’t worry! If this plugin isn’t what you are looking for, I will also go over how to set it up via your .htaccess file. Read below to see how easy and simple it is to set up 301 redirects through the plugin.
Redirection Plugin
First, you will want to download and activate the Redirection plugin. If you want an easy link to the WordPress website, click the title Redirection Plugin right above.

After activation, go on WordPress and find the Tools tab on the left side of the screen.
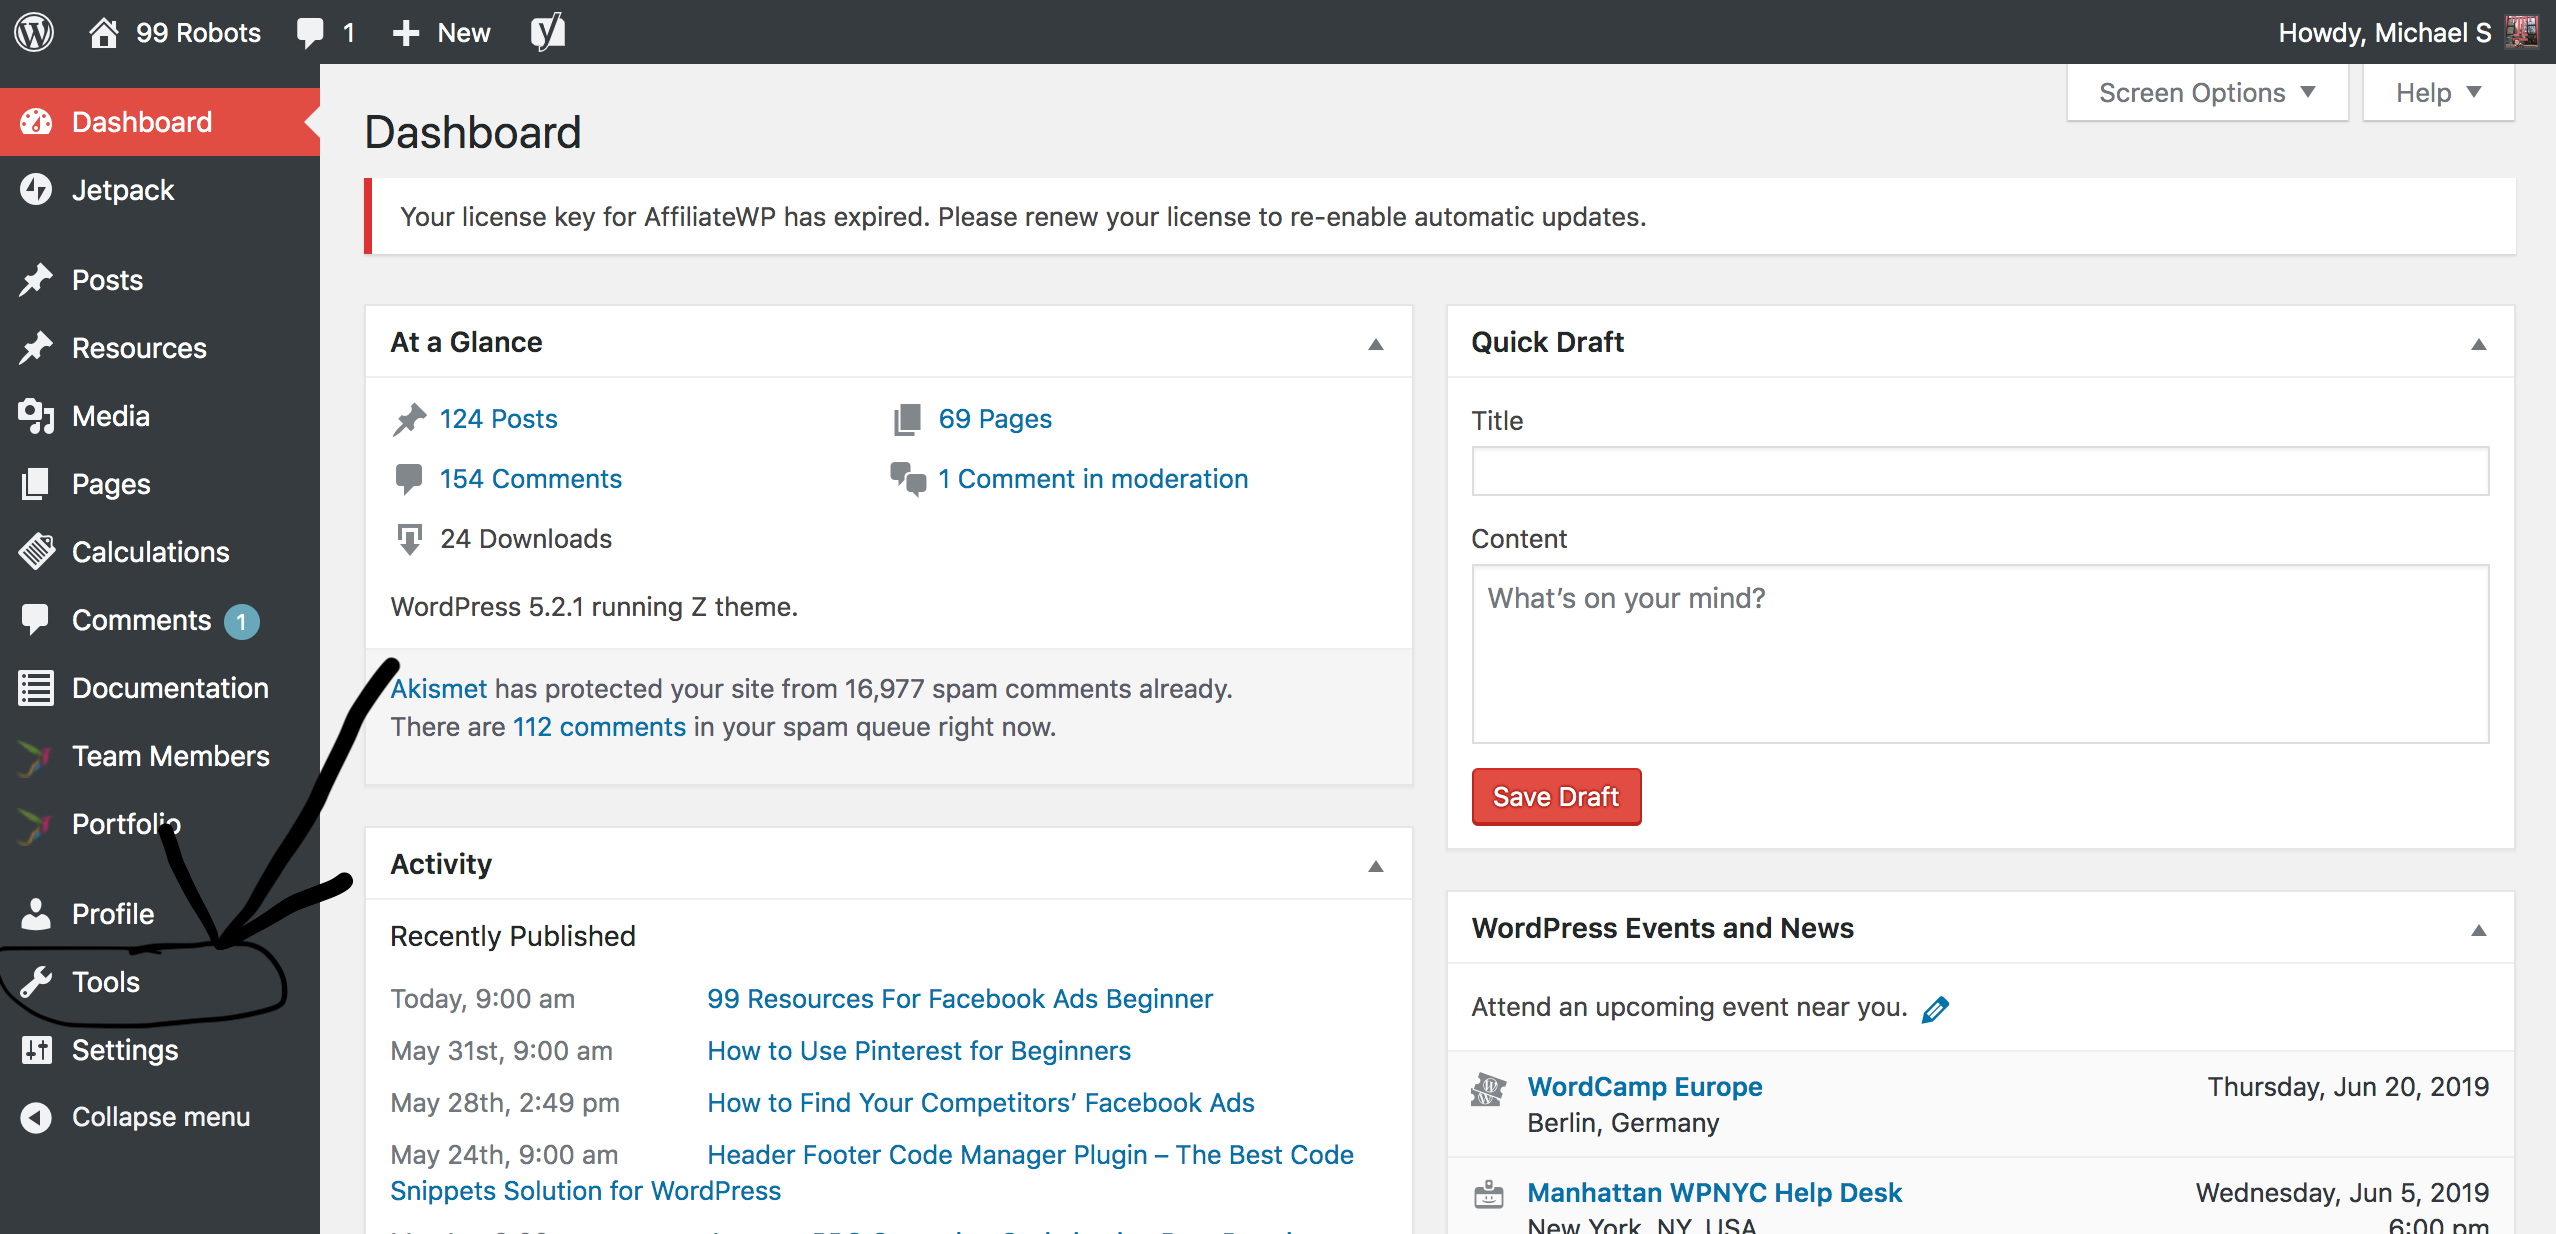
Once in Tools click on Redirection to get started on your redirects
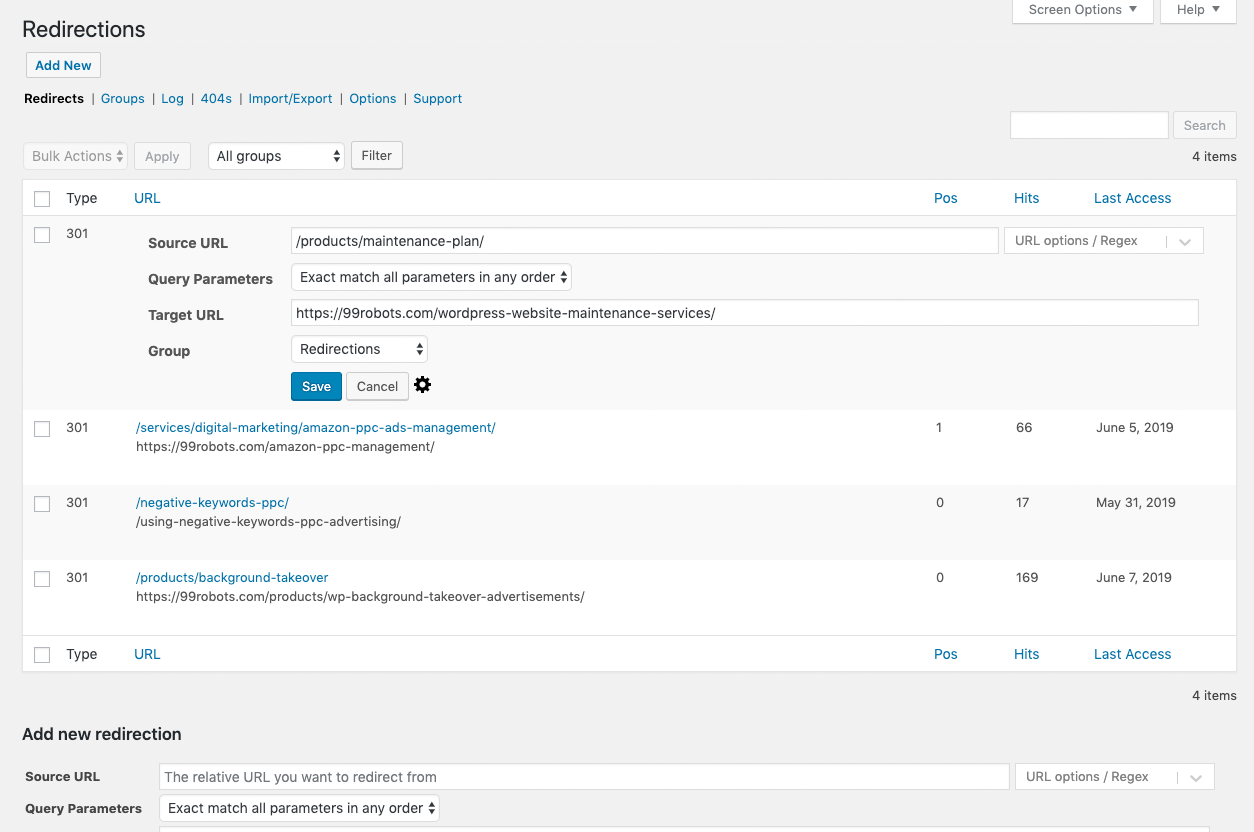
That’s it! How easy was that?! Another great part of this plugin is that it will also help you discover 404 errors on your WordPress website. This can be an incredibly useful plugin if fully taken advantage of.
How to Set Up 301 Redirects Using .htaccess File
In order to set up 301 Redirects via your .htaccess file, you will want to begin by logging into your hosting account’s control panel or cPanel. Once in your cPanel/Control panel, you should have a File Manager that you can launch from your panel.
After it is launched, you will need to find the root folder of the website in which you are applying the 301 Redirect to. Once found, open the website’s .htaccess file. If you cannot find one this may mean your web host is requiring that you enable the show hidden files option first. If the website does not have one, create a new file and name it “.htaccess”.
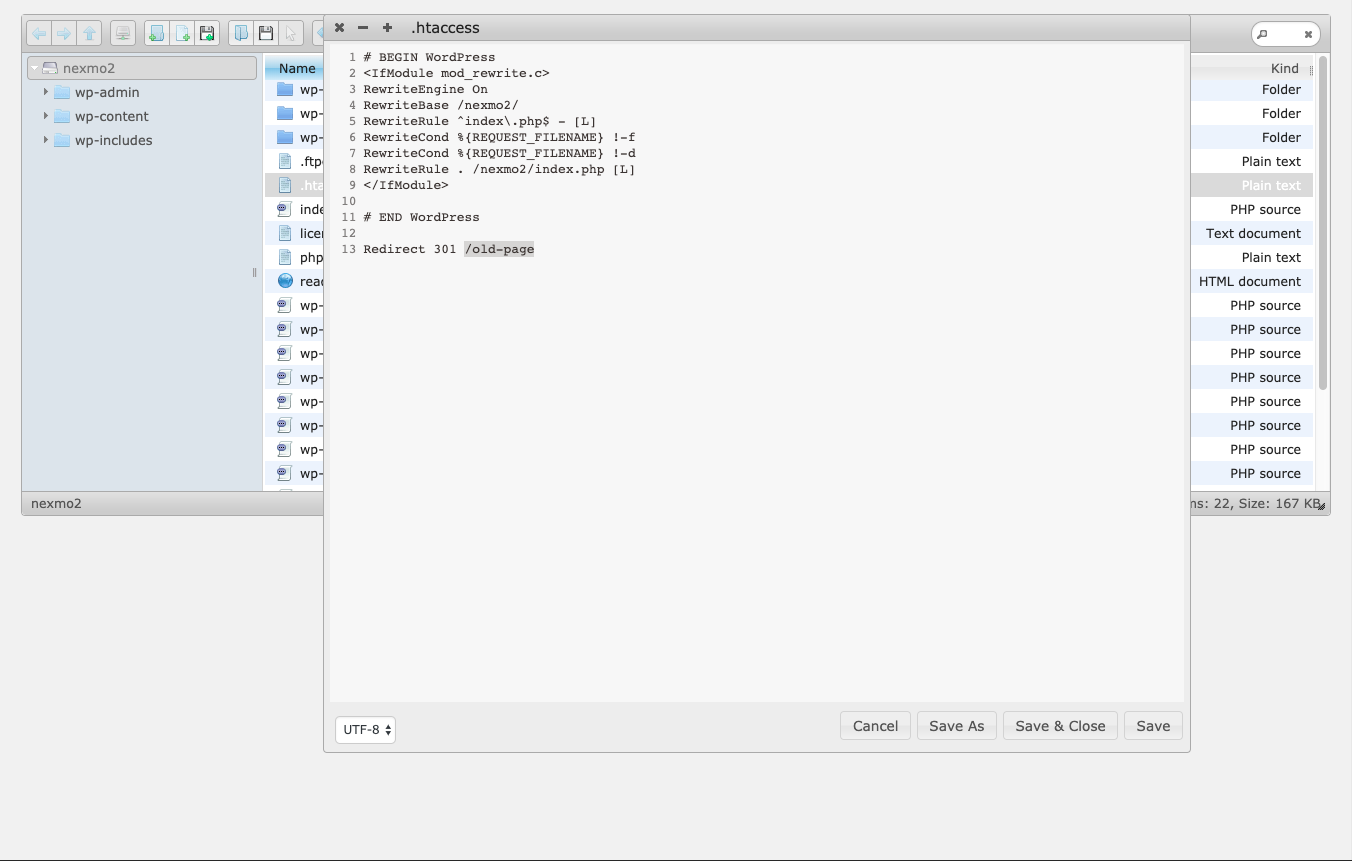
Once your file is loaded up, you should see something like this
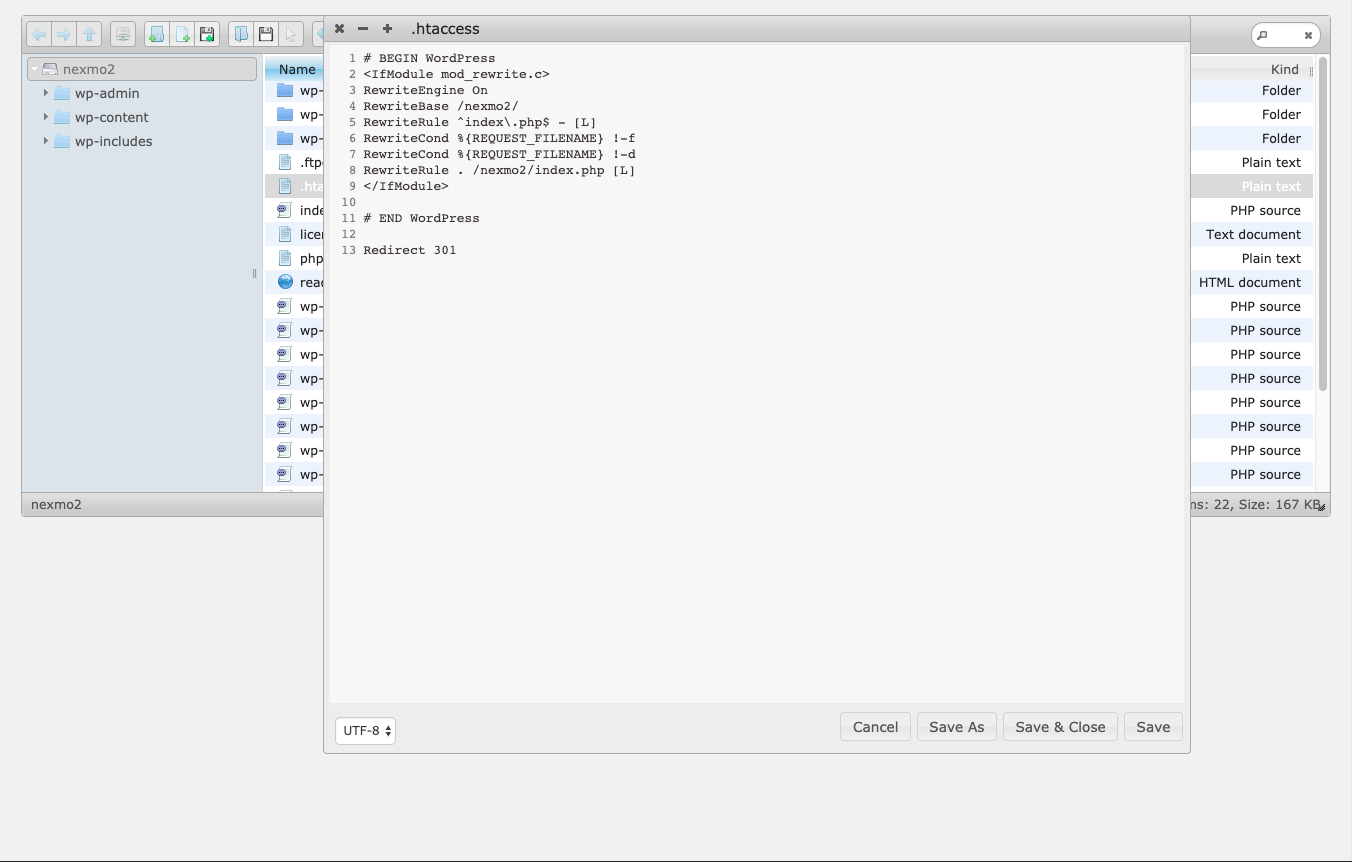
To add a 301 Redirect, enter the words Redirect 301 below the line that says # END WordPress. After this, you will need to determine the OLD url that you want to redirect traffic from. Since you’re editing the .htaccess of a specific domain, you only need the URL elements after the “.com” extension. For example, if your page was “www.oldwebsite.com/old-page”, you will only need to insert /old-blog/ in order to apply the 301 redirect.
To finish the redirect, all you need to do is add the full URL of the new page. For example, www.yoursite.com/new-blog/
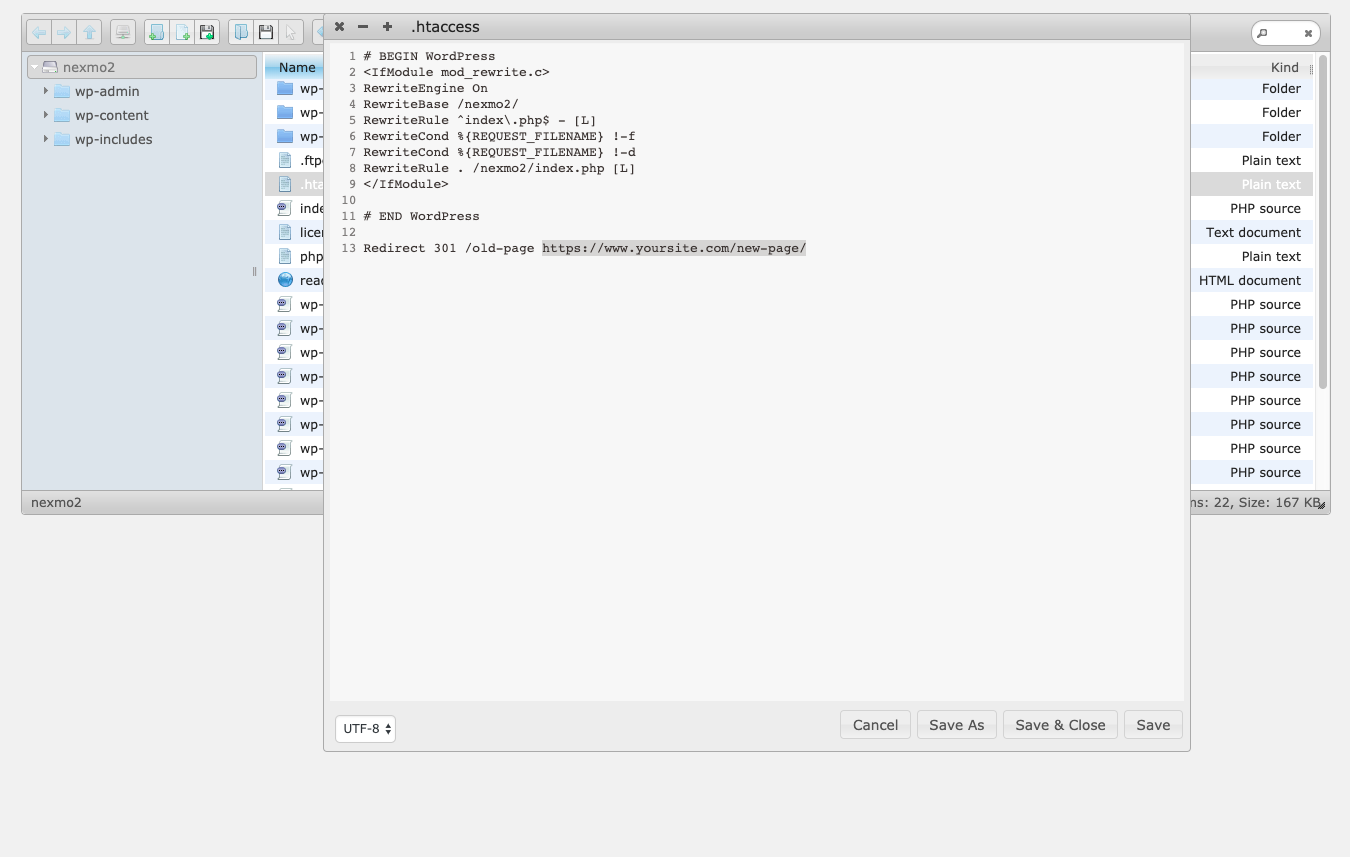
Make sure you save the changes you made to your .httaccess file. Once you do that, you are all done! Not too difficult, right? Hopefully, after reading this article, you will realize how important 301 Redirects are and just how easy they are to create.