About Interstitial Overlays
Interstitial Overlays is a beautiful way to add Interstitial pages to your WordPress site.
Dashboard
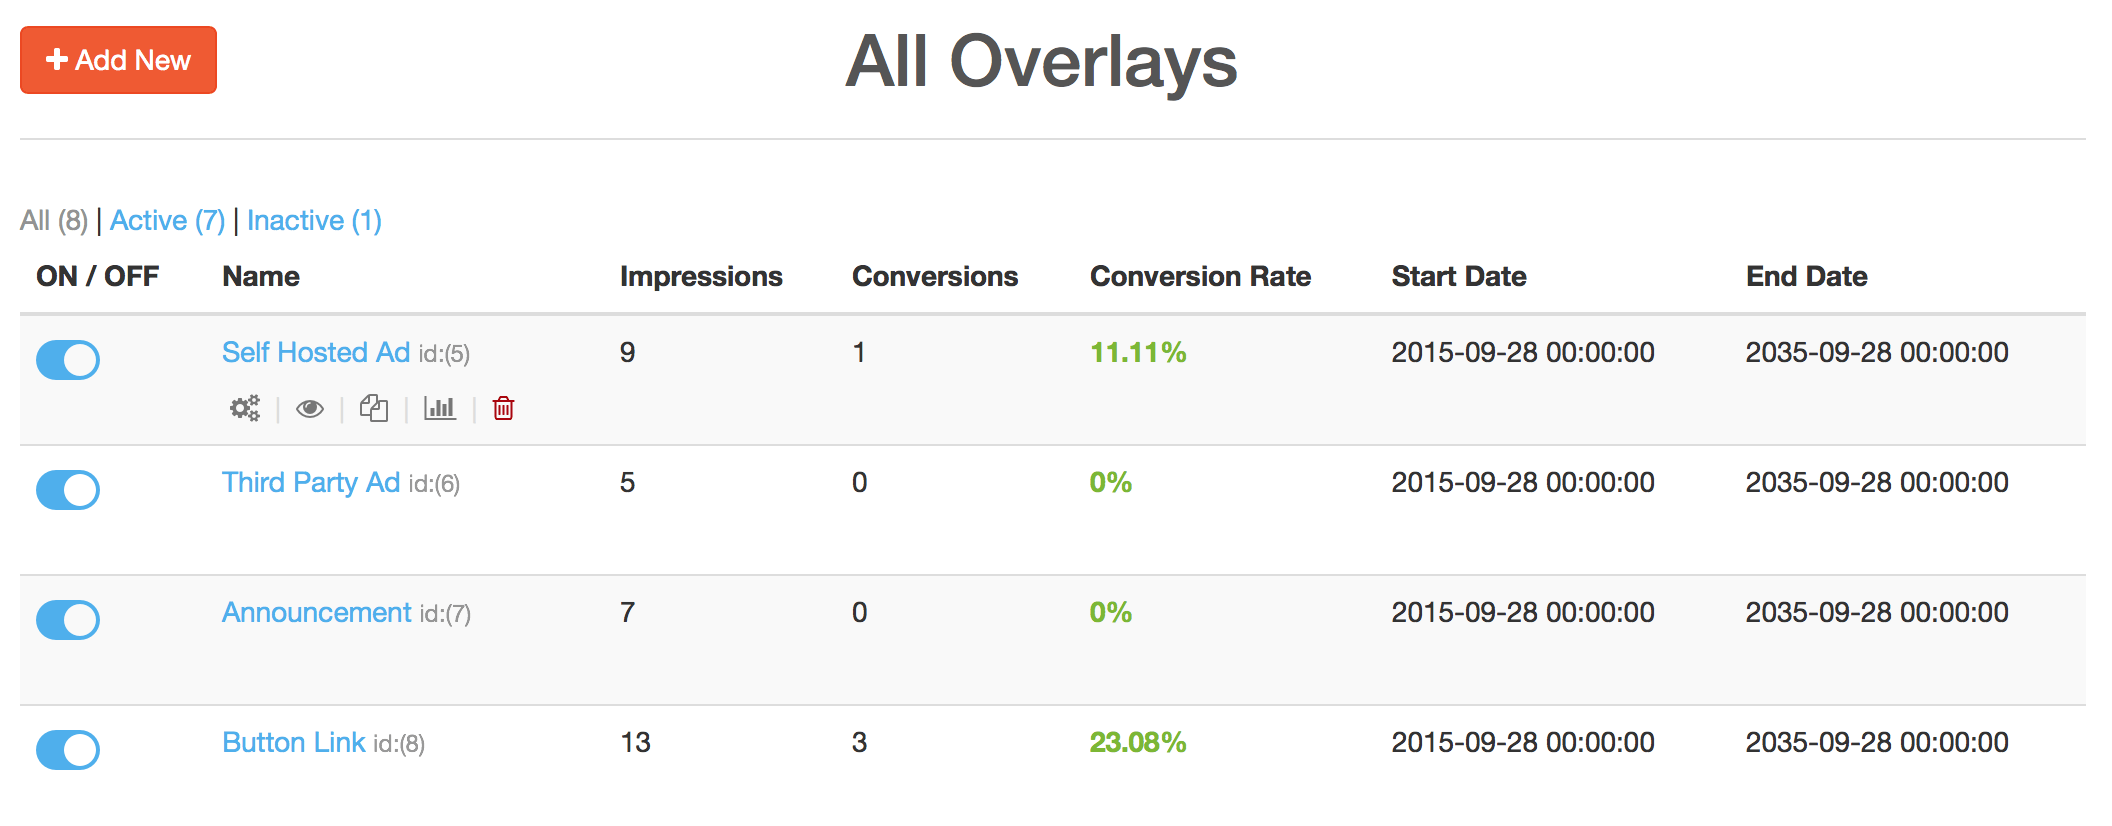
The dashboard page is where you will be able to see all of your interstitial overlays that you have created. You can active and deactivate certain overlays from this page as well as these other actions.
- Preview
- Duplicate
- Delete
Content Types
Interstitial Overlays comes with 8 main content types.
- Self Hosted Ad
- Third Party Ad
- Announcement
- Button Link
- Age Verifier
- Acceptance Page
- Newsletter Optin
- None
You can change the content type of an interstitial overlay at any time and different content types will function differently on your site. For example, the Self Hosted Ad content type is useful if you want to display an image from your media library or a URL on your site, while the Third Party Ad is useful for displaying ad scripts. If you feel as though you don’t want to have any special functionality then you can choose the None content type to just display a message or whatever else you have in your content.
Settings
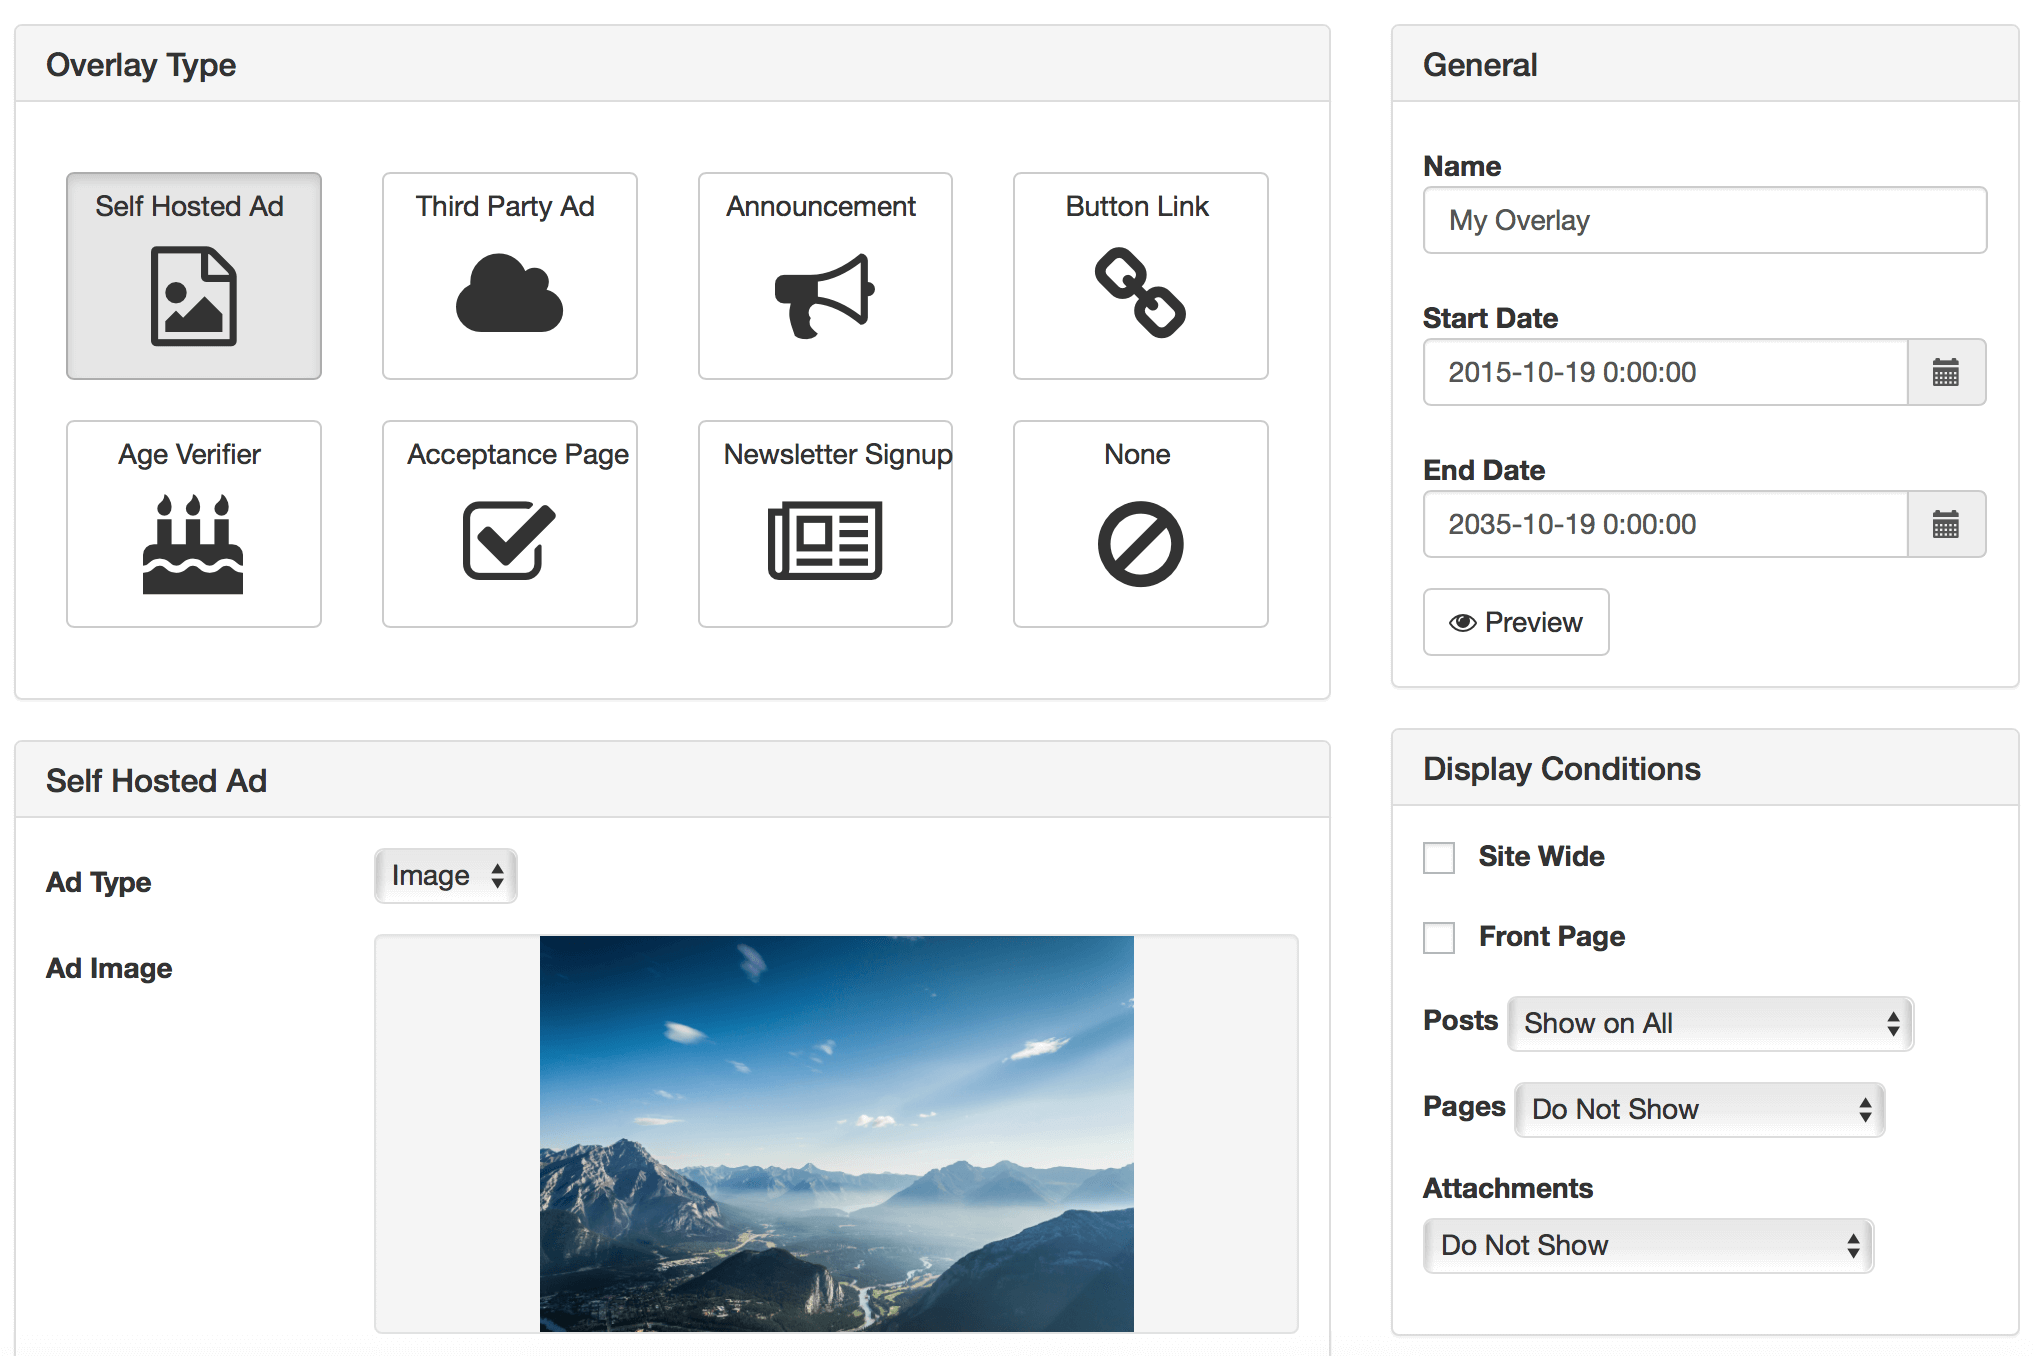
Interstitial Overlays comes with a lot of settings to create very specific and targeting overlays. There are four main parts of the settings page.
- Date Range
- Display Conditions
- Content
- Style
The date range will allow your to only show an interstitial overlay during certain days. You can just create the overlays and set it to only display for the next week and after that it will automatically not show without you having to deactivate it.
The display conditions settings are very powerful and they allow you to show an interstitial overlay anywhere on your WordPress site. Interstitial Overlays hooks into custom post type and taxonomies so that you can have the most control over where the overlay is shown. Also, if there are certain post or pages that you want to never show an interstitial overlay then you can simply exclude just those specific posts without affecting your other settings. There are also more conditions you can set like whether or not the viewer is a user on your site or what domain they came from and even showing on a mobile or desktop only.
The content is everything within the interstitial overlay. We leverage WordPress’s default post editor so you can add any type of data you want, even videos. Basically what content you can add into an WordPress post you can add into an interstitial overlay.
Finally you will be able to specify different colors for your interstitial overlays so that you can brand them however you want. Add a background color or image and even a pattern.
Stats
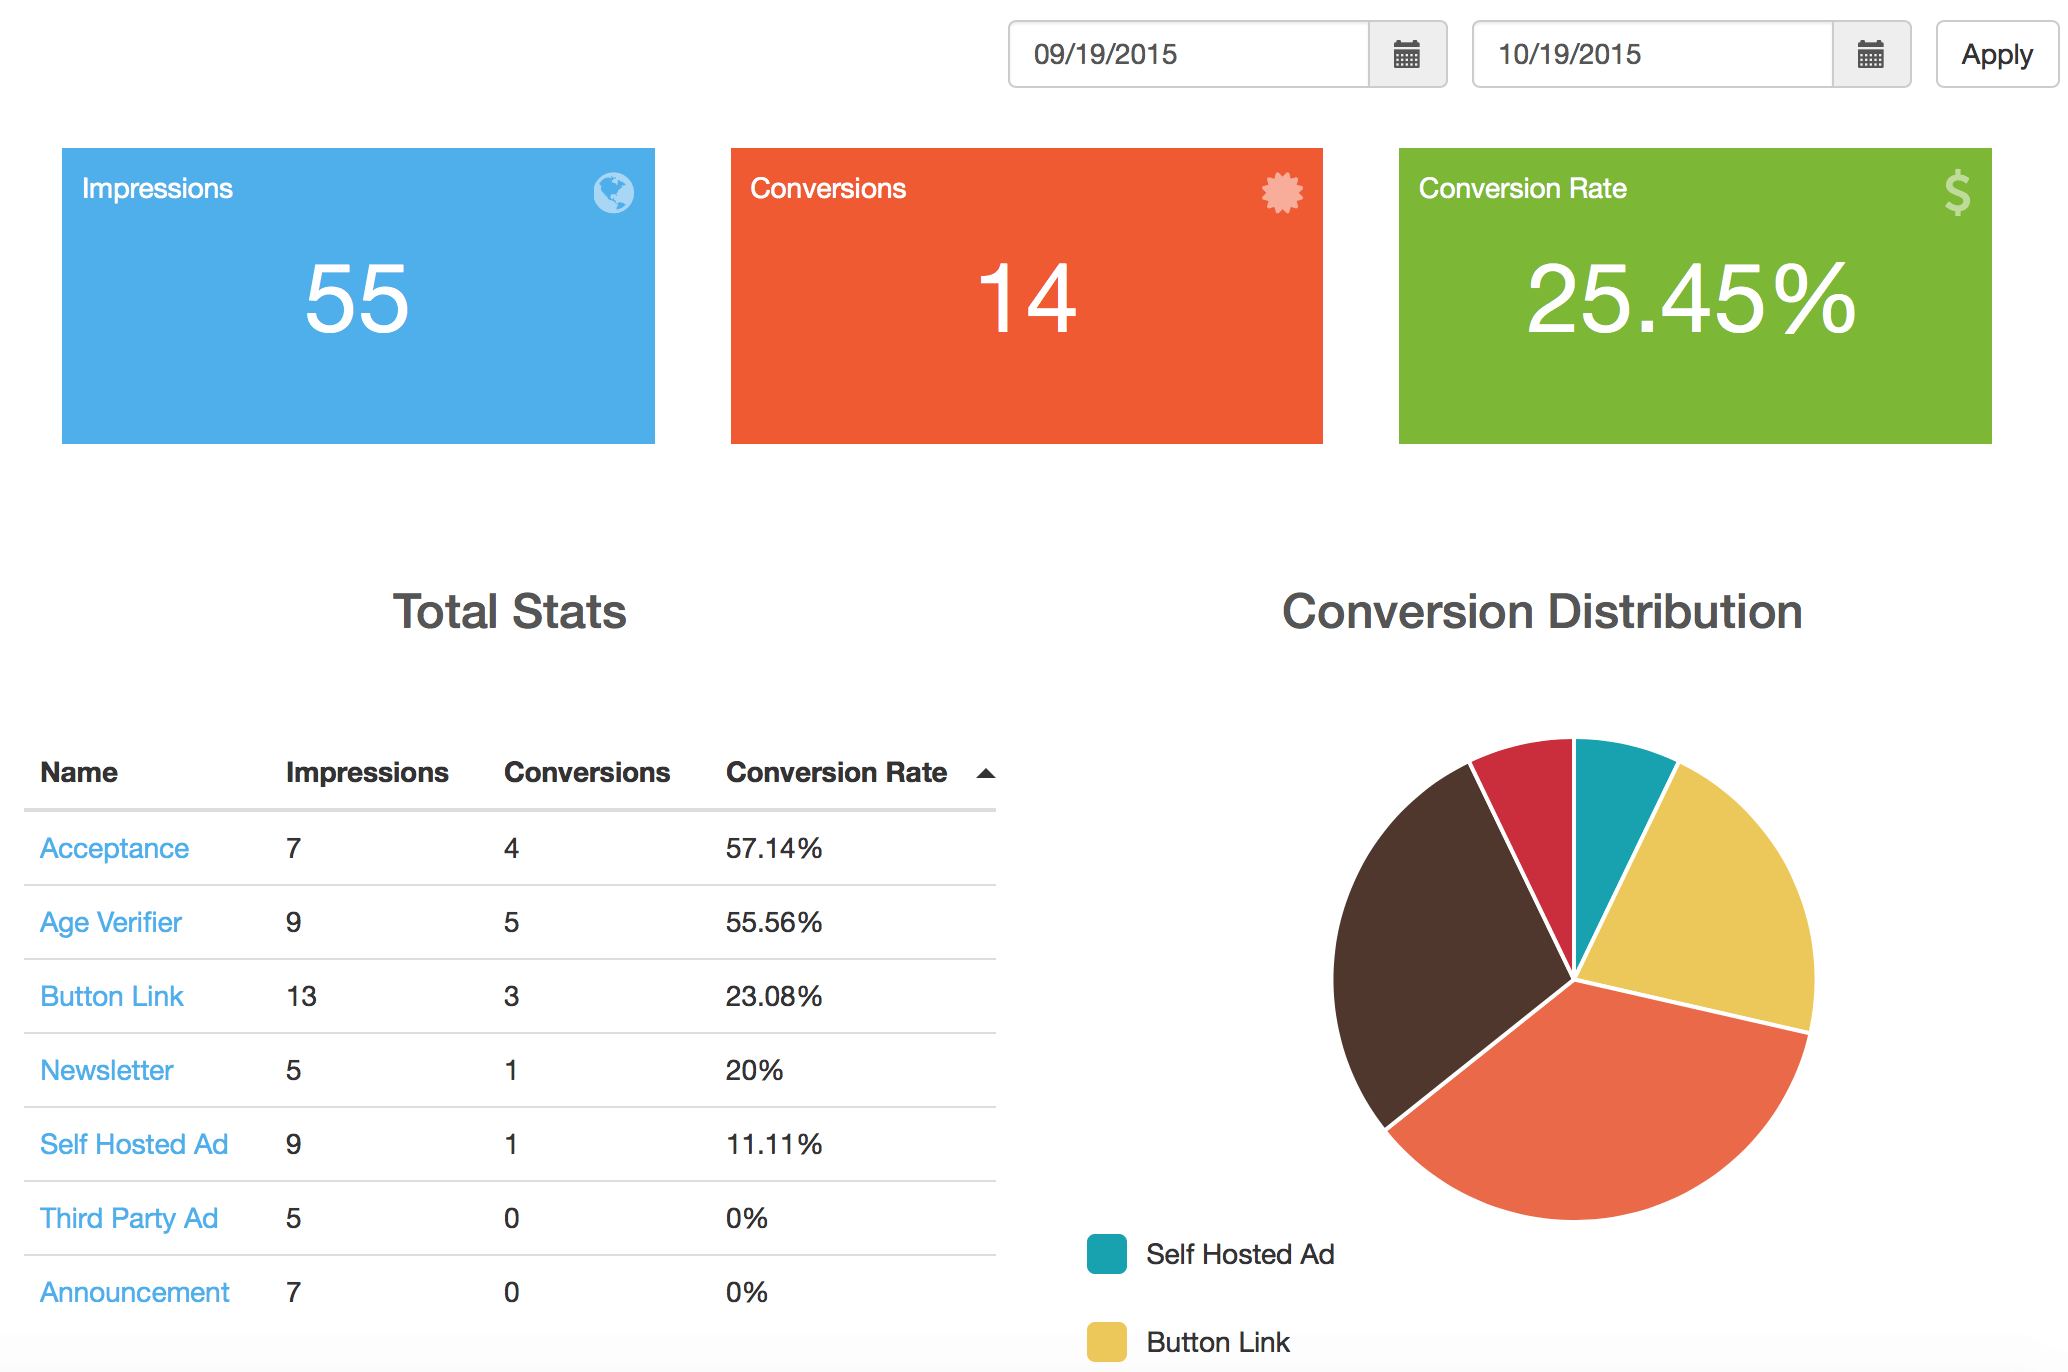
Interstitial Overlays are very useful for a site owner and they become even more powerful when you use the built in stats tracker. All impressions and conversions of your overlays are tracked so that you can see what overlays are performing the best as well as pricing out self hosted ads at the correct price based on number of impressions. Interstitial Overlays stats are more accurate than most stats trackers since it does not count views from admins on your site, so you can be sure that your impression and conversion counts are accurate.
Email List

If you use the Newsletter option content type and specify that you want to store all the emails in your WordPress site then you can view them from this page. You can see what email form each submission as well as what overlay it came from.