About Optin Fire
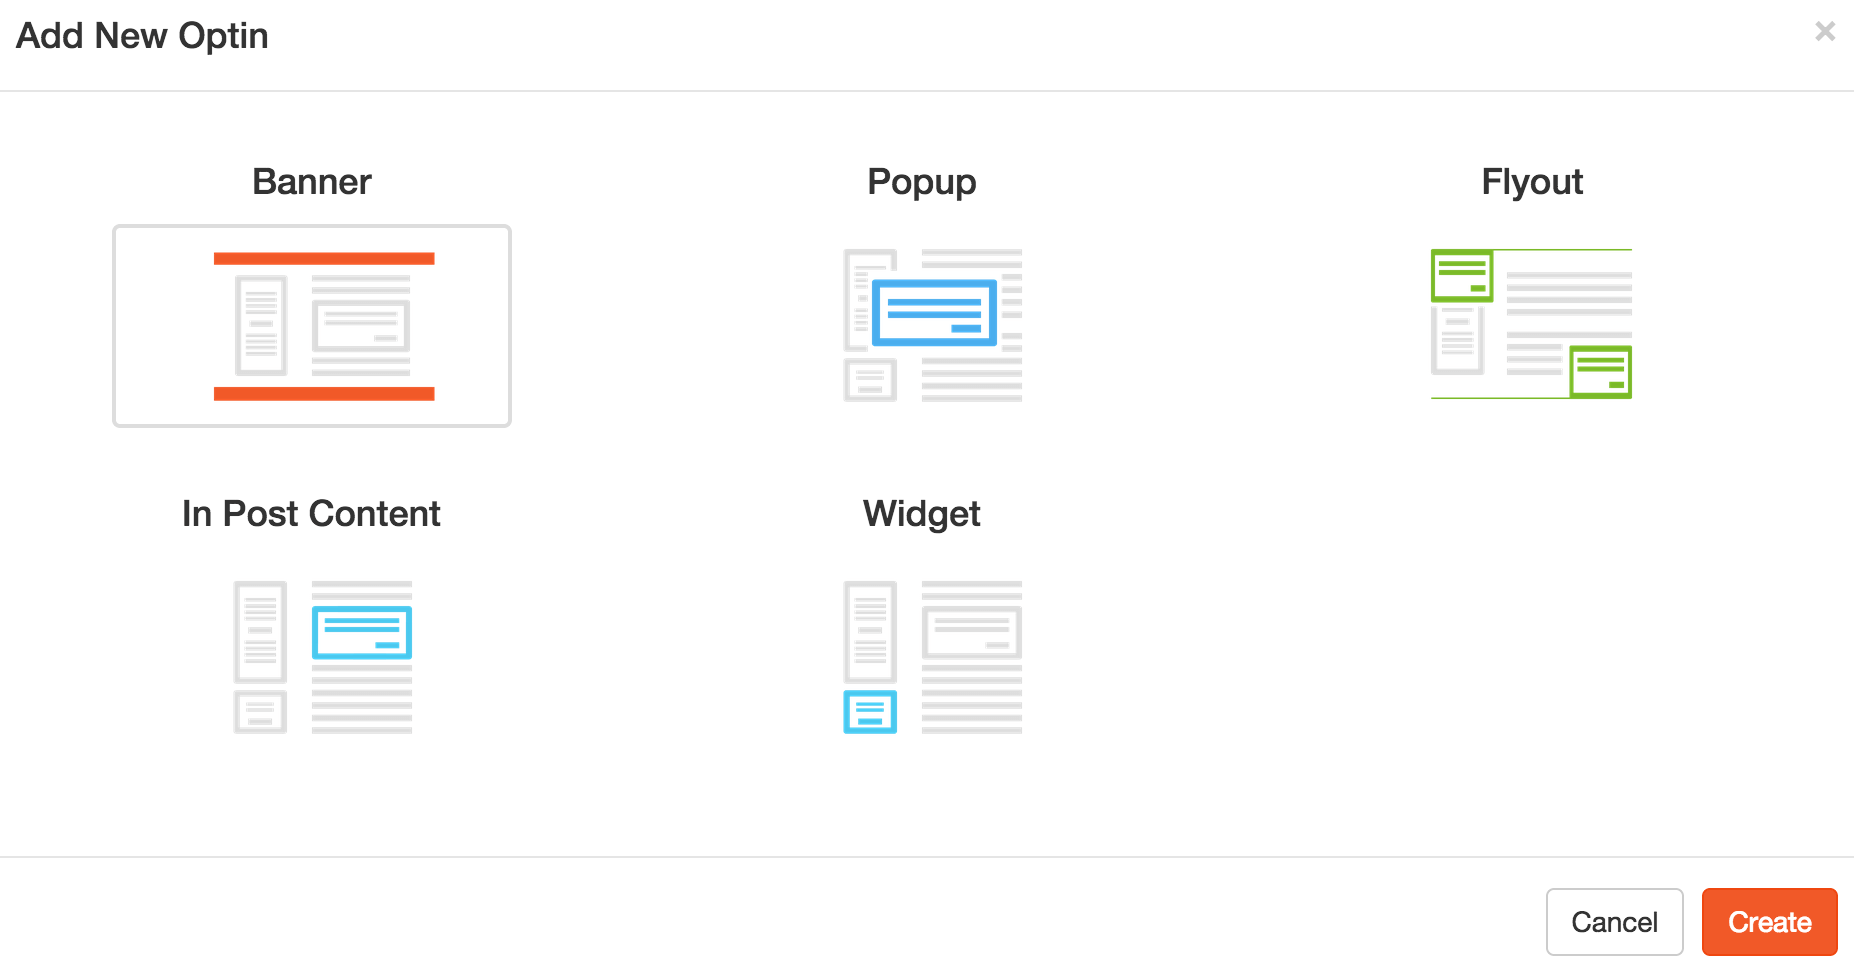
The Optin Fire WordPress plugin allows you to add a highly customizable and targeted Optins to any page of your website. There five main types of Optins that you can create: Banner, Popup, Flyout, In Post Content and Widget.
All Optins

This window will give you a quick preview of your Optins including status, name, impressions, conversion rate, type and display location. Also, from the All Optins section you can turn a specific Optin ON or OFF, edit, preview, duplicate, add variant or delete it. At the top of the screen you can add a new Optin.
Single Optin
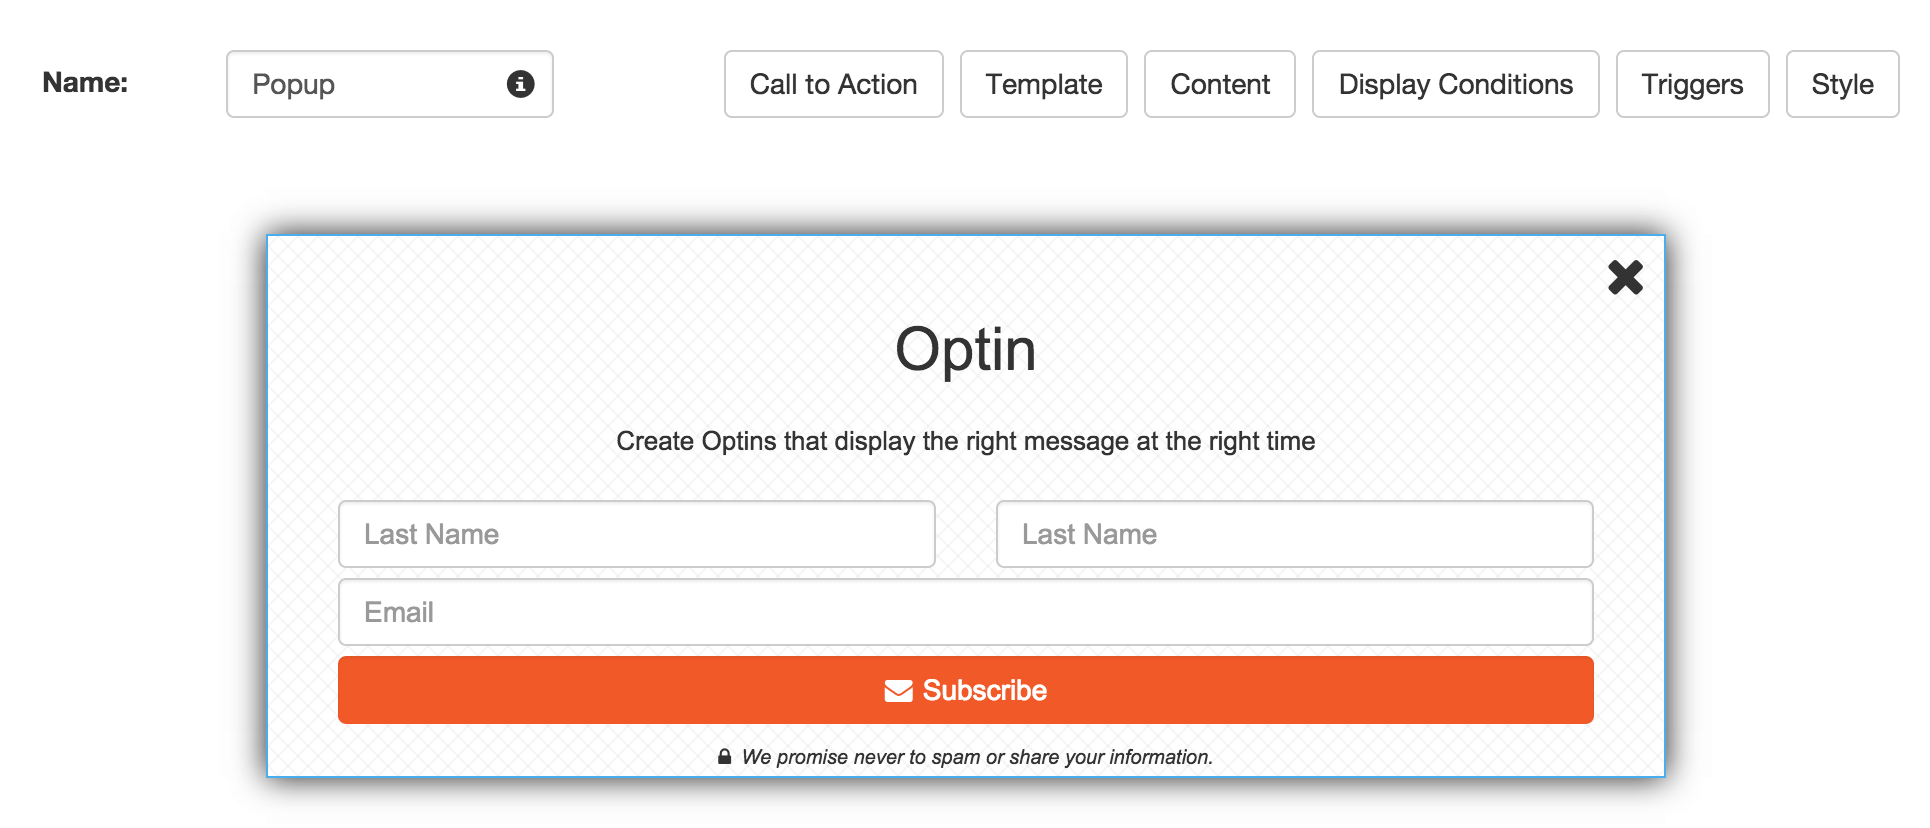
The Single Optin page is where you will be able to preview your optin as well as edit it. There are six main sections for an Optin and we go over them in detail below.
- Call to Action
- Template
- Content
- Display Conditions
- Triggers
- Style
Call to Action
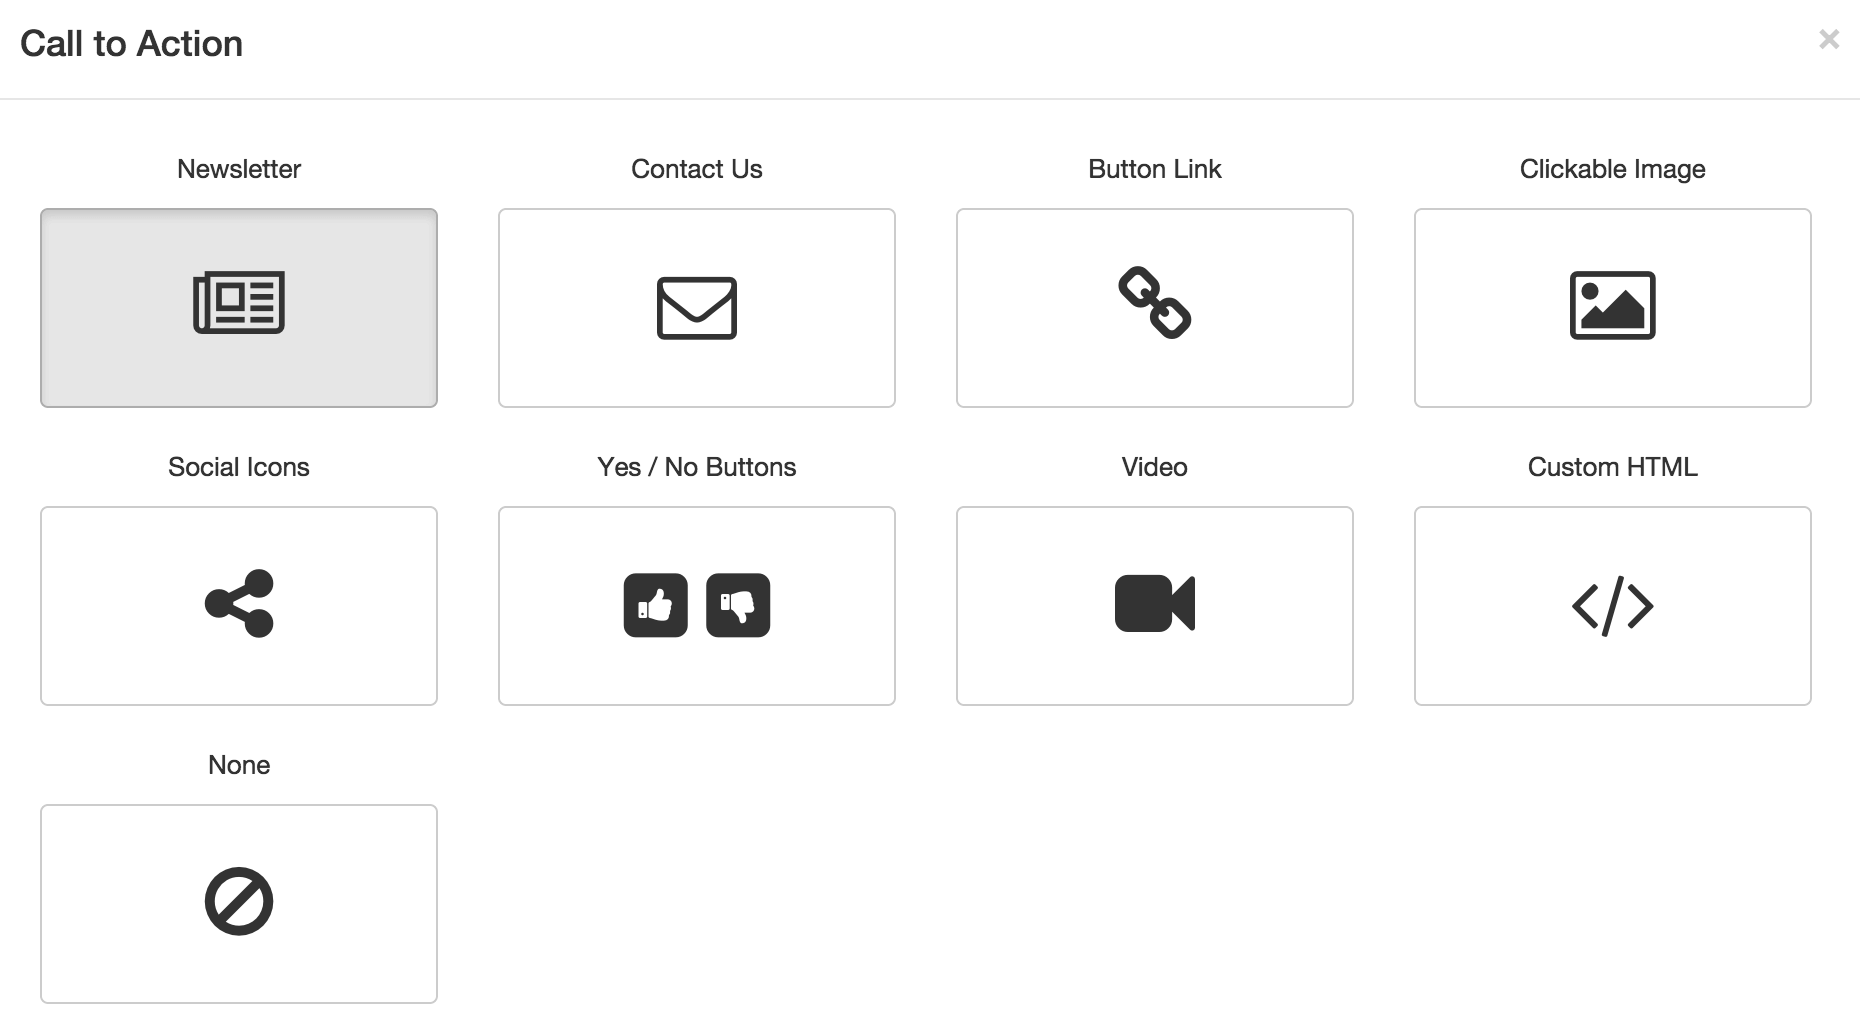
A Call to Action is something on your website that should provoke an immediate response from your viewers, usually resulting in a conversion of some kind.
Template
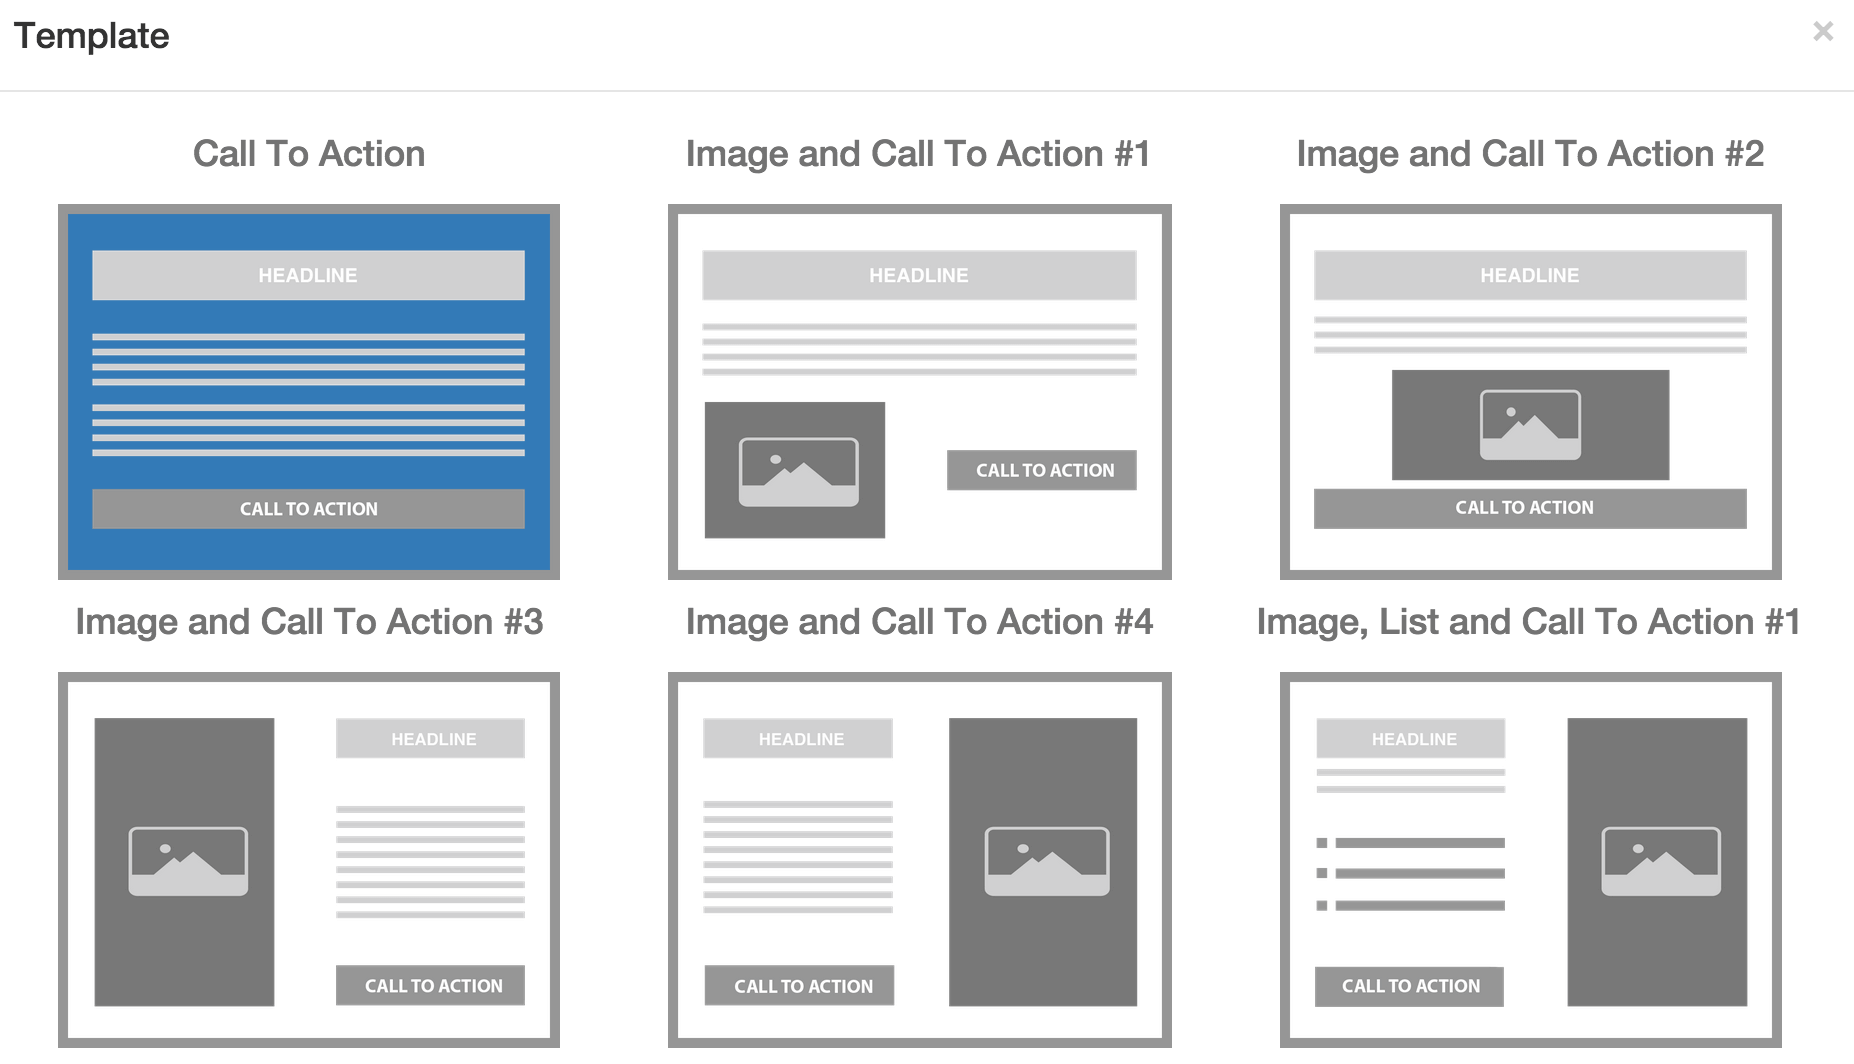
The Template section is only visible for Popup and In Post Content Optins. You can choose from 7 different templates with more to come.
Content
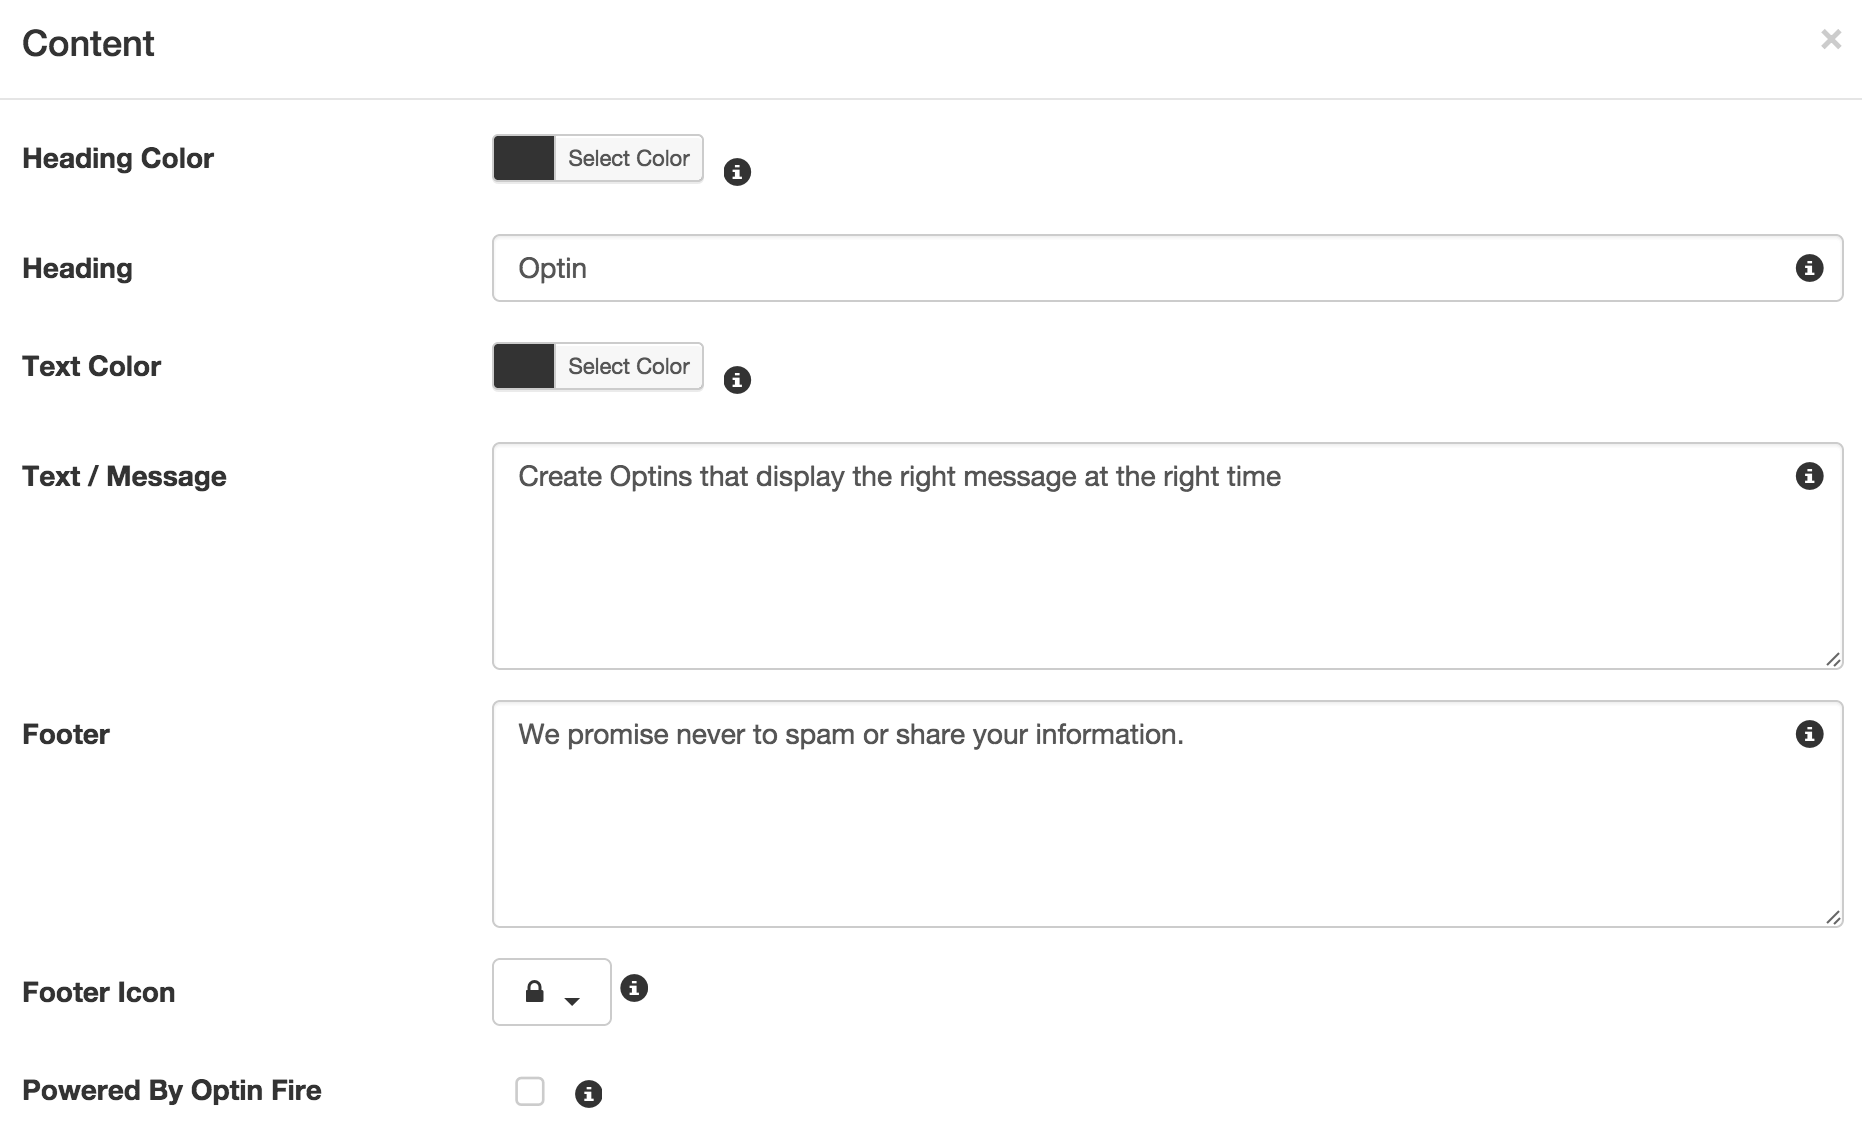
This is where you will be able to add all the content of an Optin, like its heading, text, footer and call to action. This is also the page where you will be able to control specific Optin type settings for each different Optin type.
Display Conditions

Inside this section you will be able to set where and when this Optin will display. There is also a setting for display on Optin on desktops and devices, desktops only or devices only.
Triggers
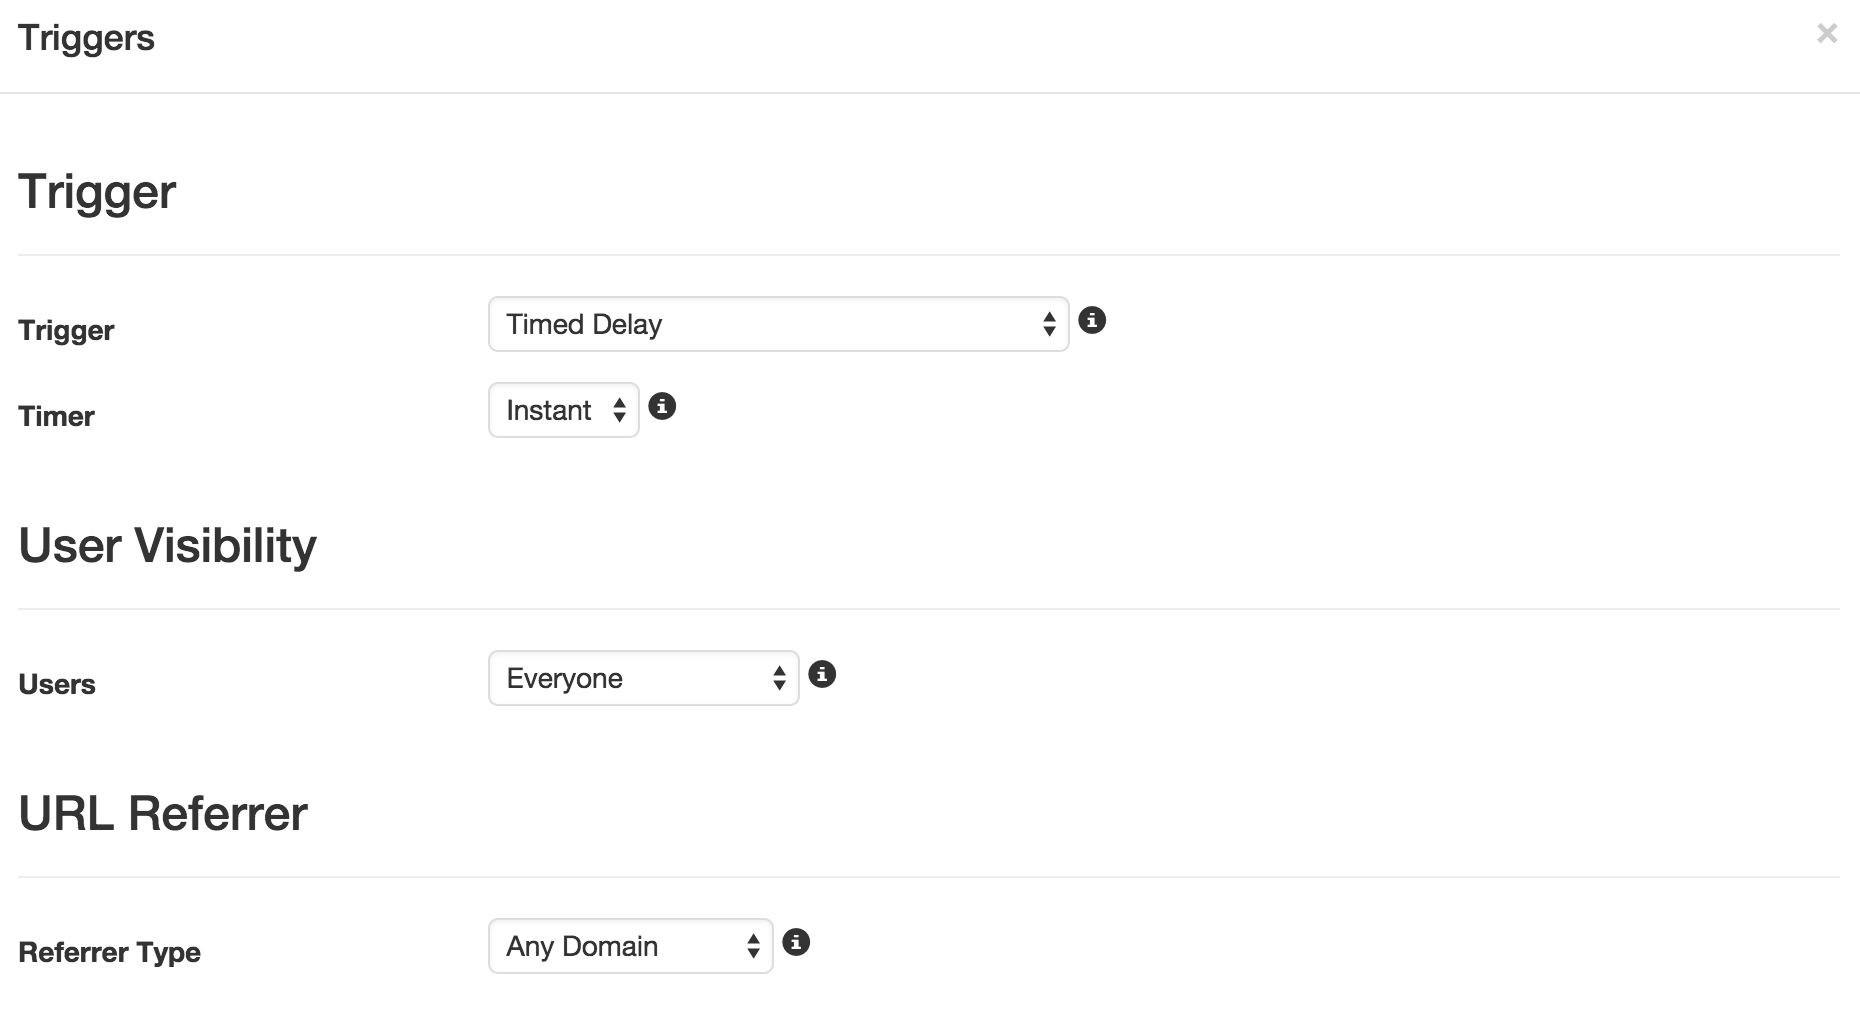
This is where you will set how the Optin is displayed to the user. We leverage WordPress to allow you to show Optins to users that are logged out or logged into your site as well as specific user roles. You can also show an Optin only if the user comes from a specific website or domain.
Style

The style section is where you will be able to set the colors and fonts of the Optin. You will also be able to add a background pattern and if you are feeling really ambitious then we have a place for you to safely add your own custom CSS.
Stat Tracking
Optin Fire has a very advanced stats tracking framework that will give you accurate data for determining your Optin’s return on investment. All Optins track impressions as well as conversions, but only users that are below Administrator status can record impressions and conversions.
We also have a very smart impression detection feature that will make sure only users who truly see your Optin actually record an impression. So what does this mean in the real world? If you have an In Post Content Optin that displays at the bottom of your post then you don’t want an impressions to be recorded if the user never scrolls to the bottom of the post. With Optin Fire impressions are not recorded until the Optin is fully shown on the user’s screen.
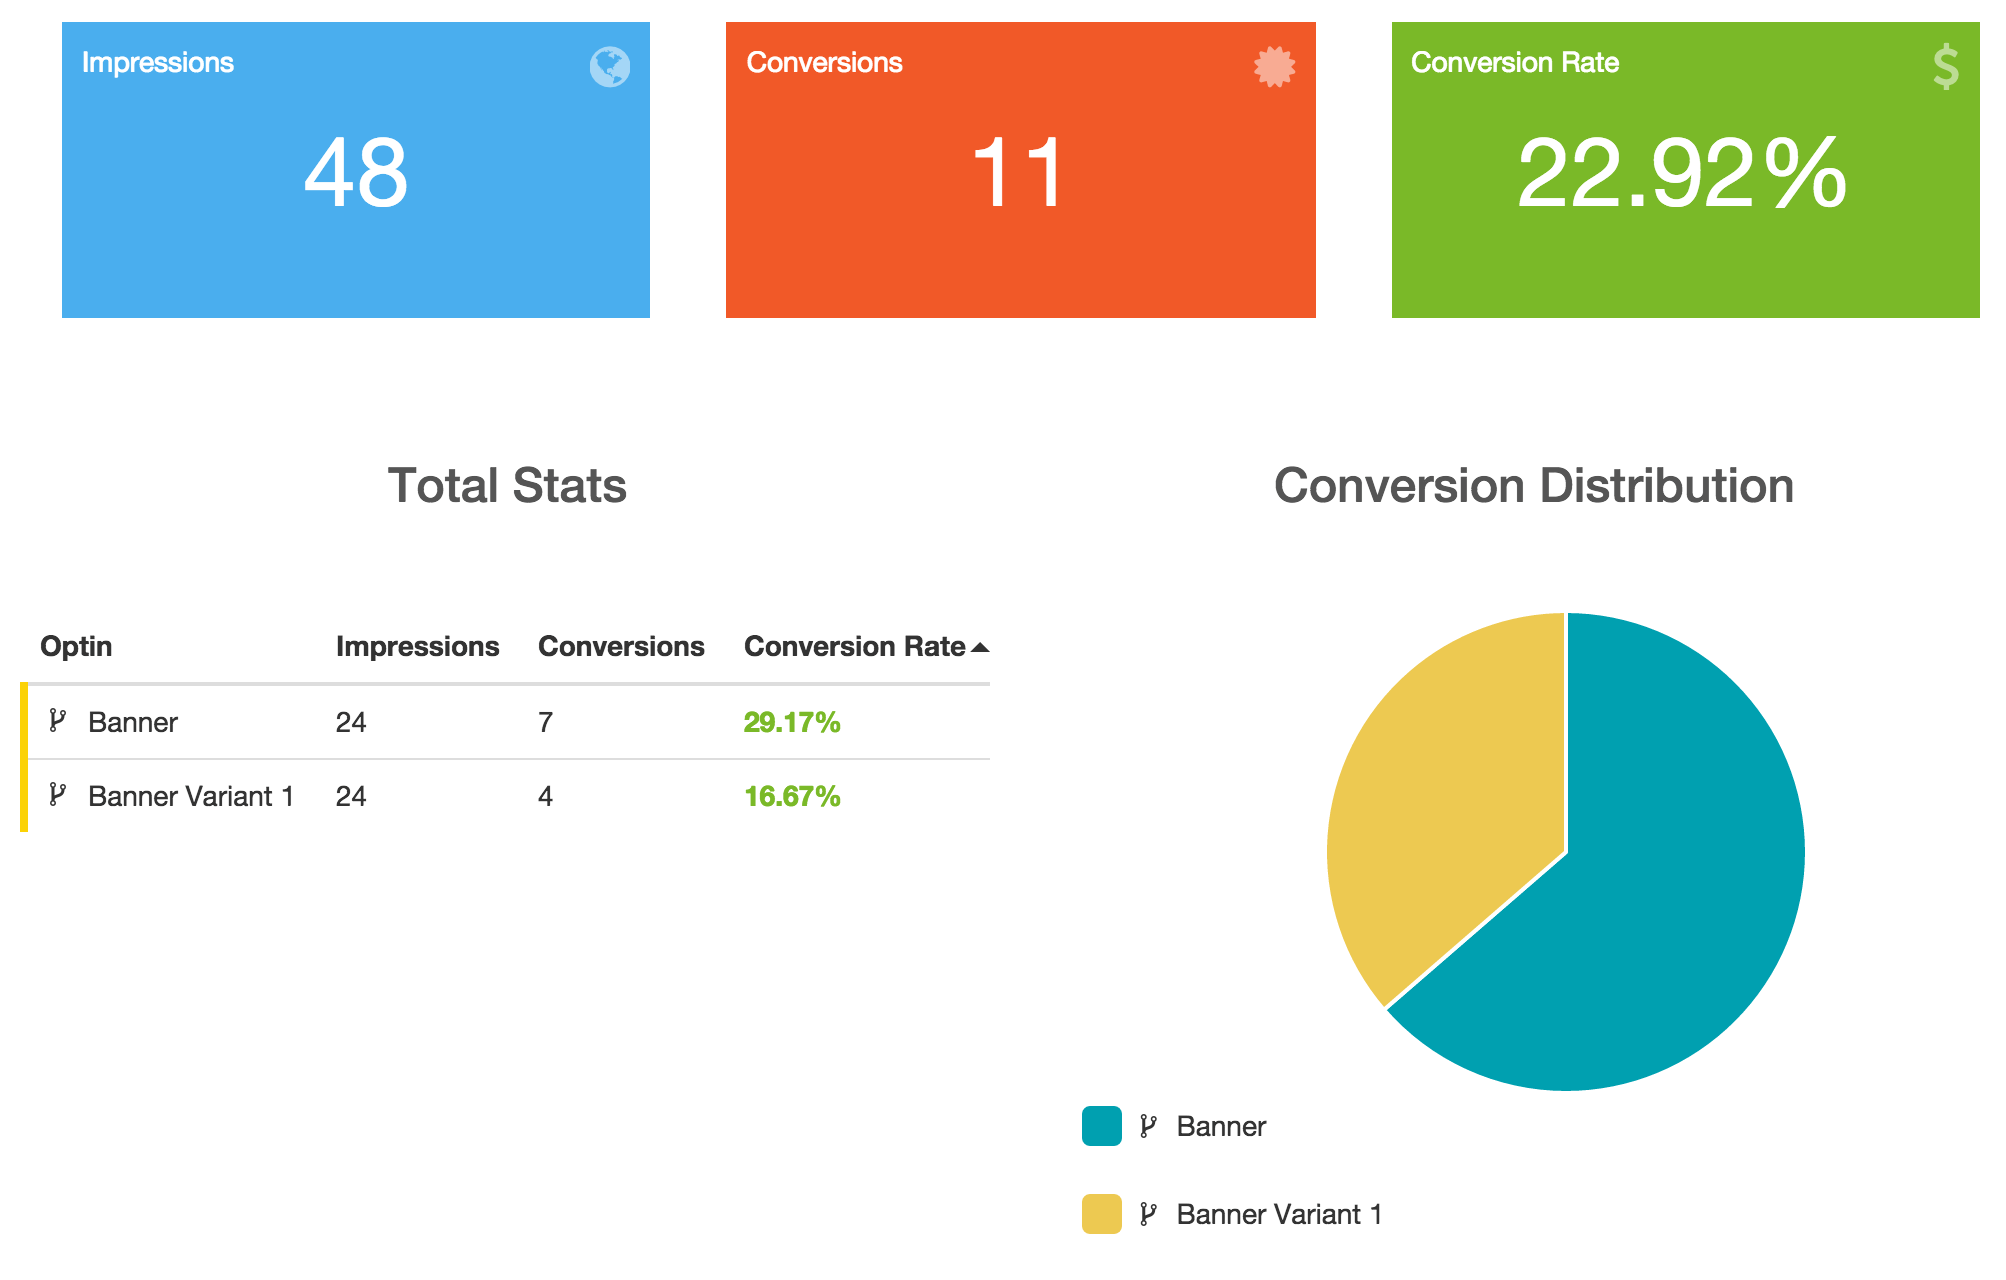
All Optin Stats
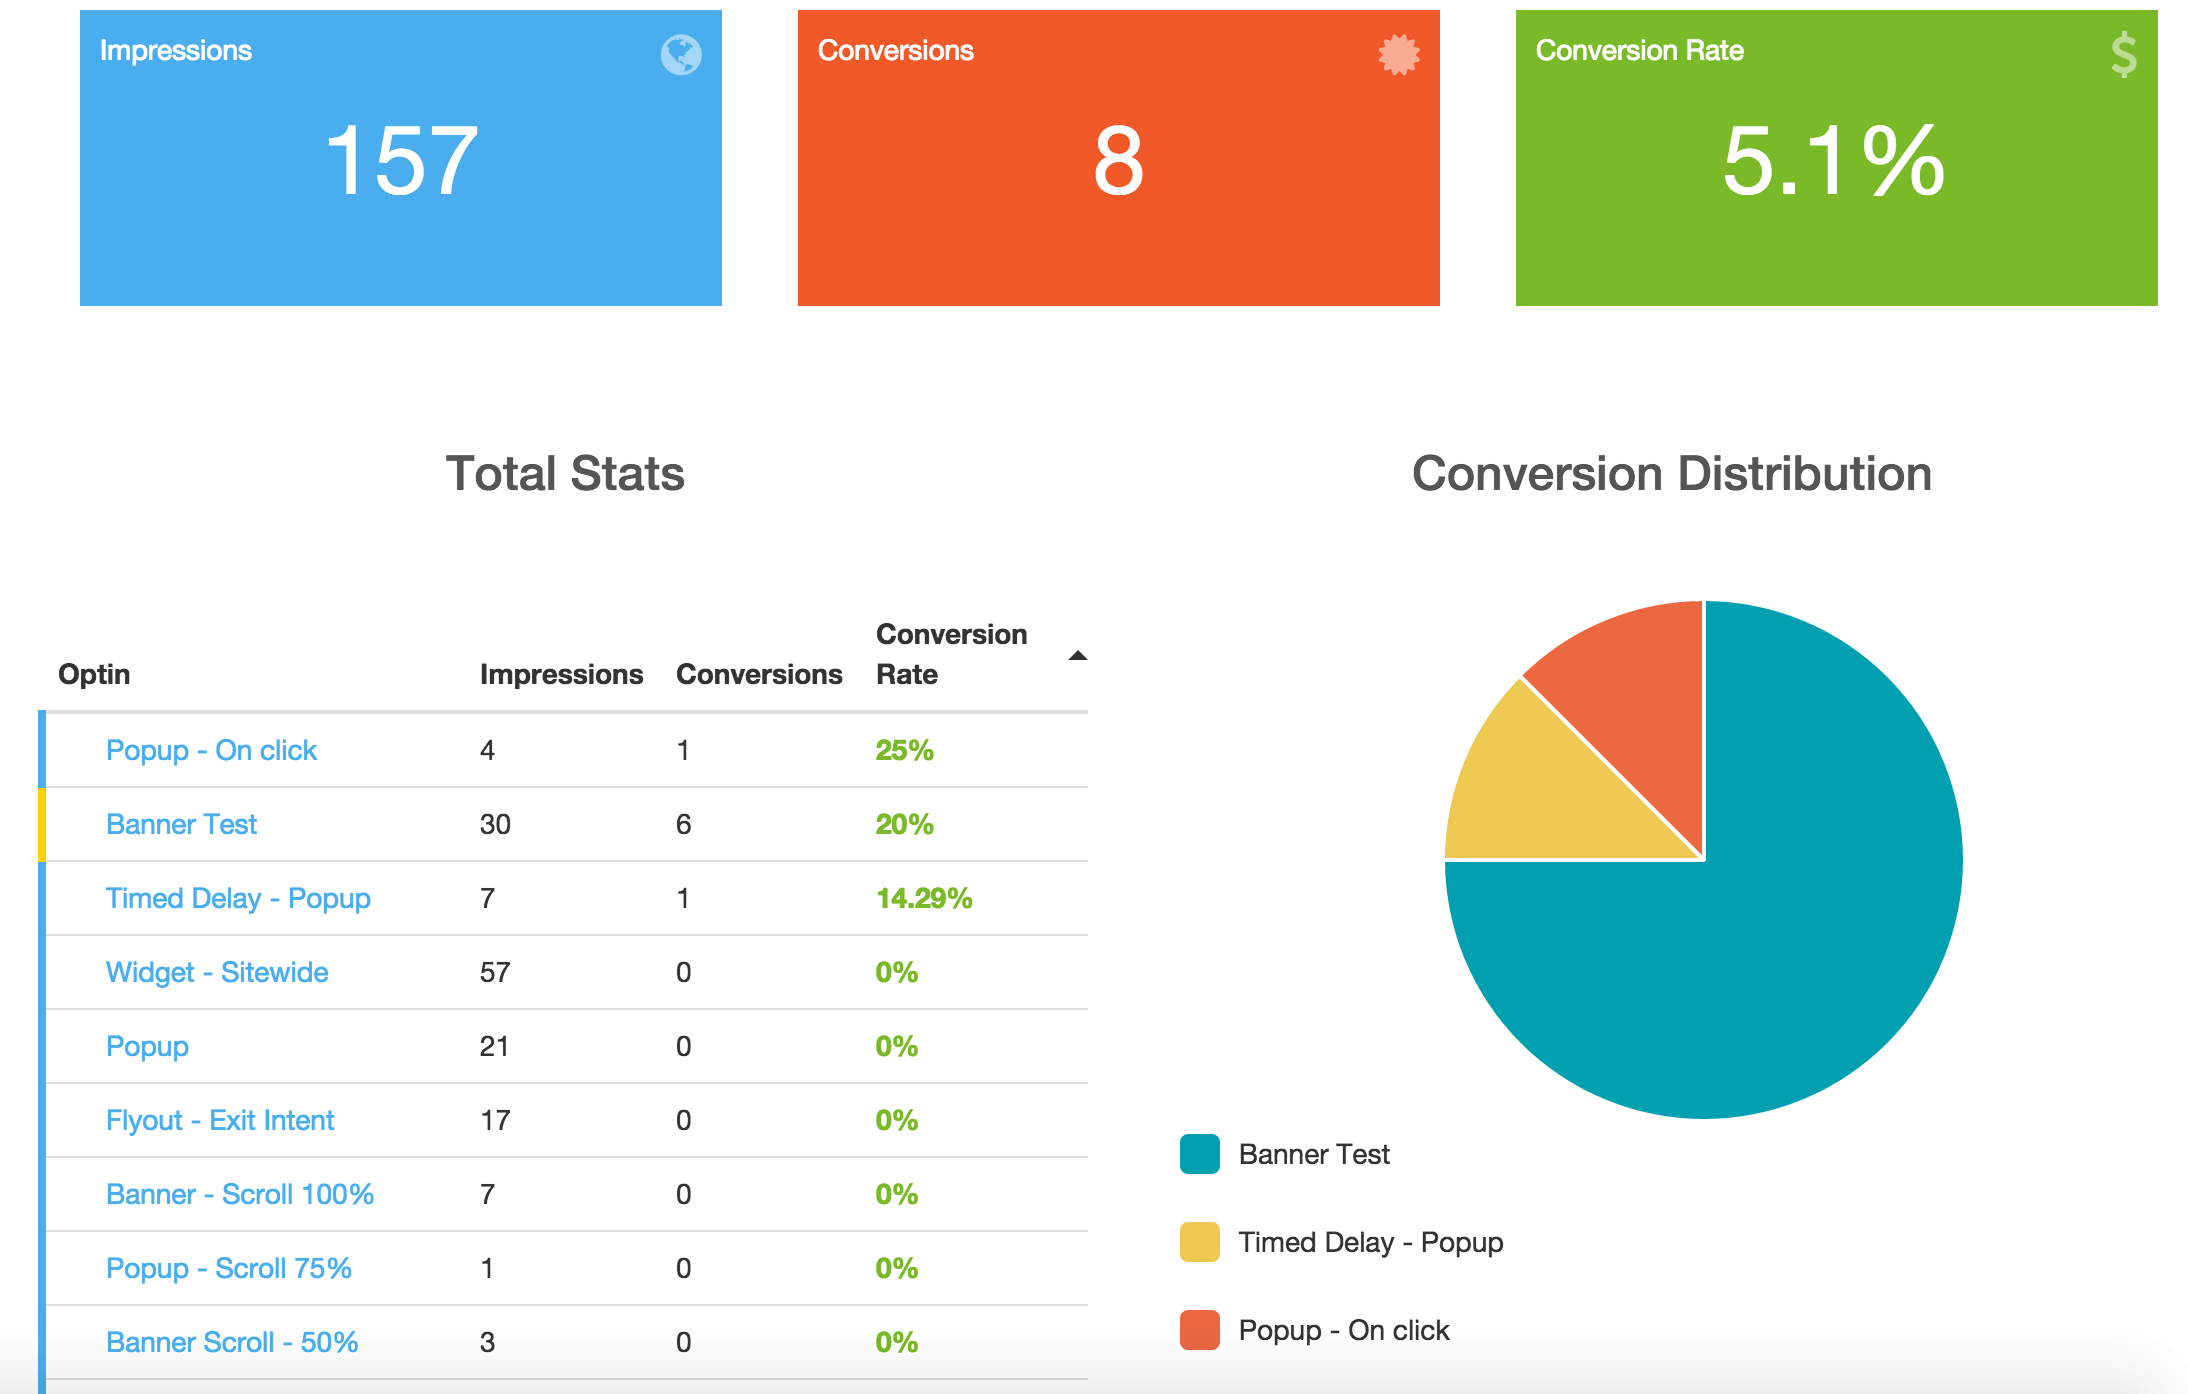
This window lets you see how well all your Optins are performing. You can see how all of your Optins are performing together as well as seeing each individual optin’s brief summary. There is also a conversion distribution graph to show you what optins on your site are getting you the most conversions.
Single Optin Stats

You can also see the stats for individual Optins here as well as the number of impressions and conversion per day.
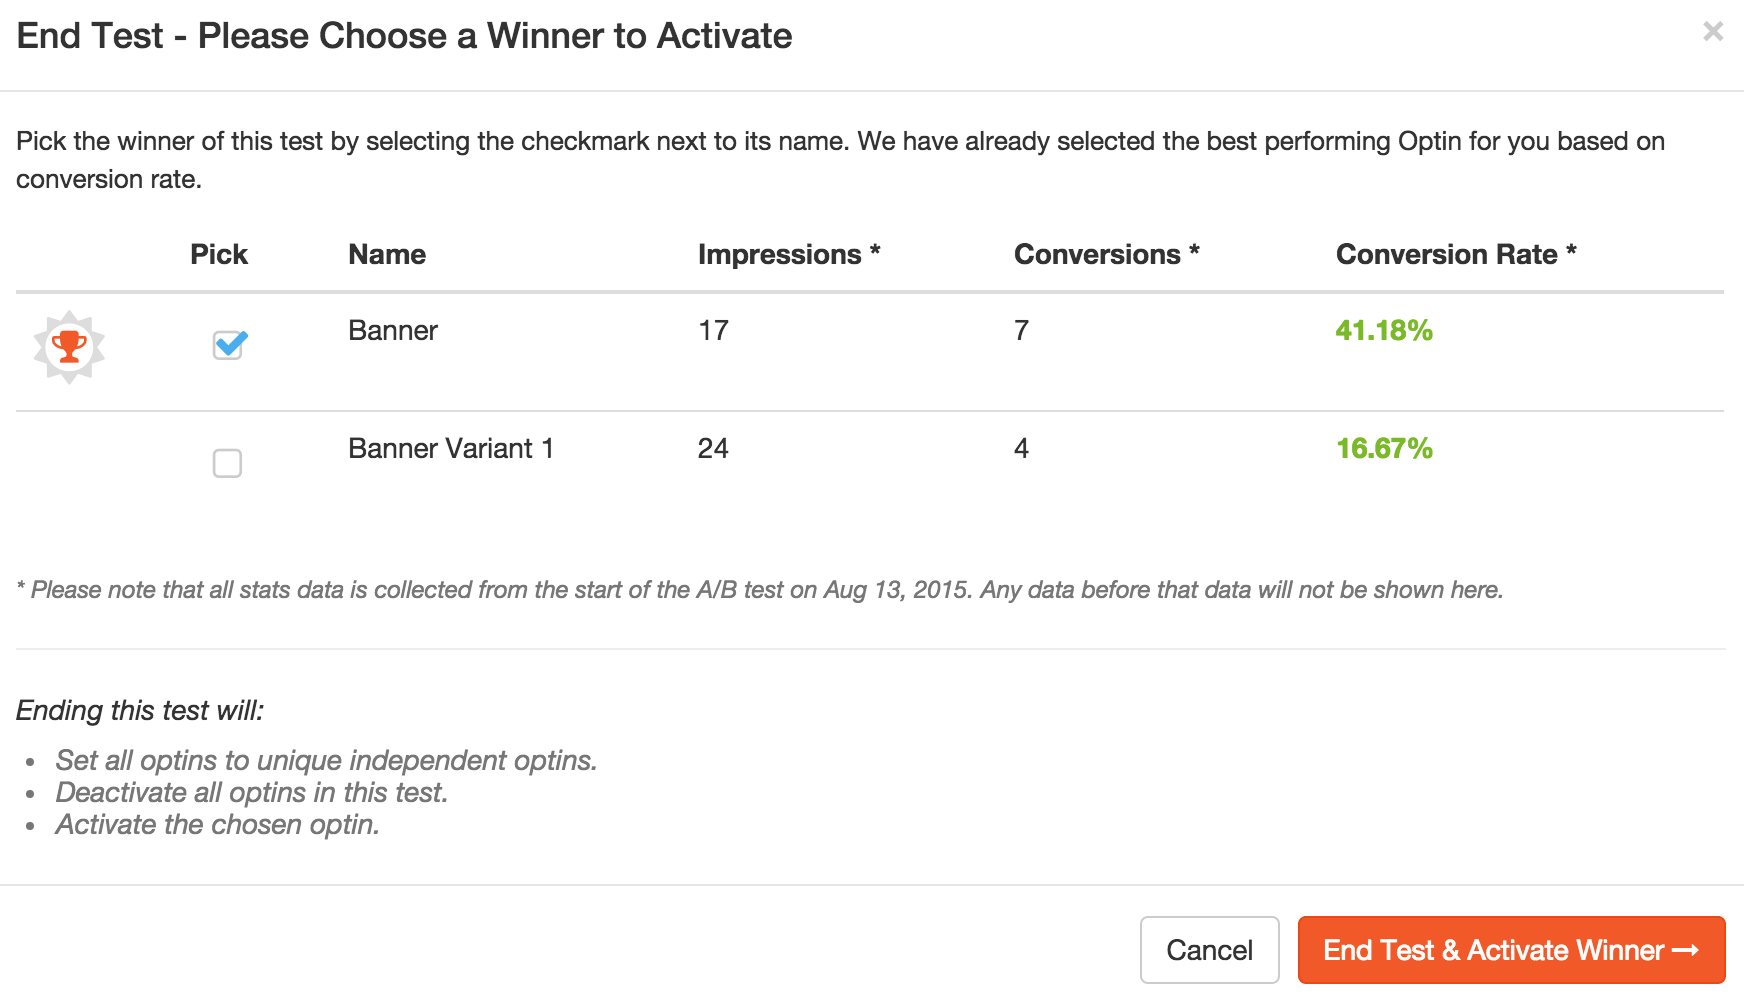
A/B Testing
*NOTE* A/B Tests impressions may vary if your site has certain caching techniques in place.
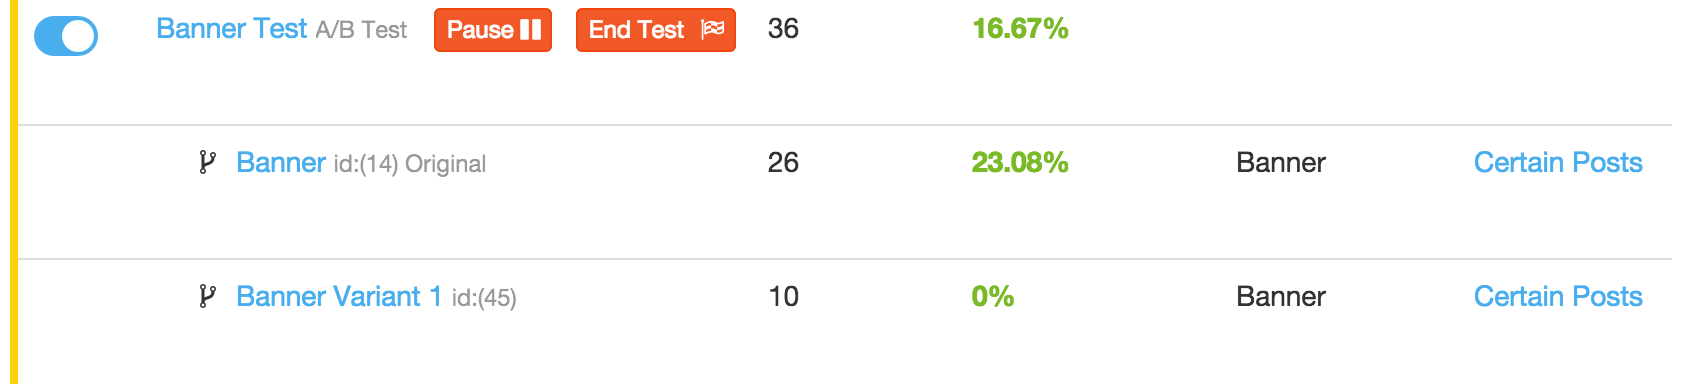
You can’t test the effectiveness of your Optins without data! Optin Fire will automatically detect when users have clicked on your Optins and track the number of conversions so you can see what works and what doesn’t. Want to test a minor change in content or a new image? Optin Fire has built-in A/B testing that easily allows you to test two or more optins, tracks their conversions, and compare their data.
Once you gather enough data you can end a test and determine a winner. The winner will then remain active and will be shown, but all other variants will be set to inactive.
Email List
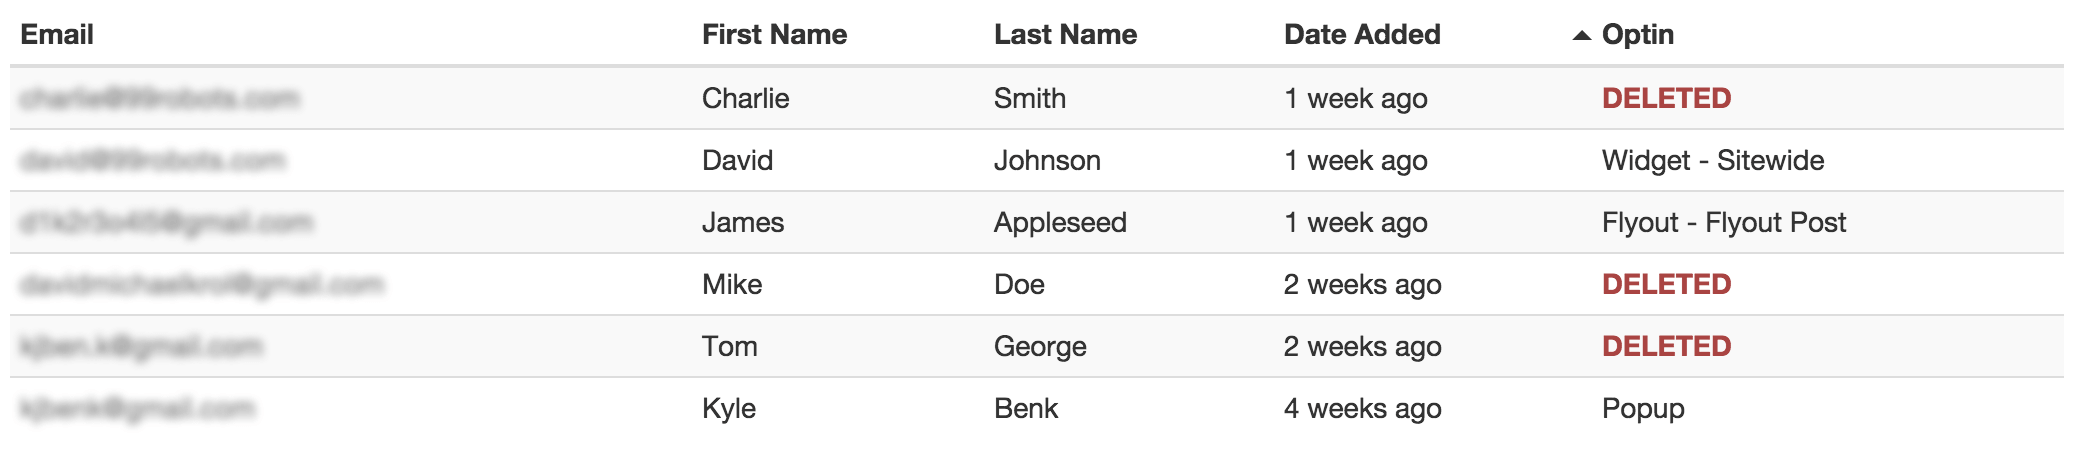
This window lets you see the emails you’ve captured using the Newsletter Content Type and choosing WordPress as the Email Capture Service. Here, you’ll be able to see first name, last name, email, date of capture, and which Optins converted the email capture.
Entries
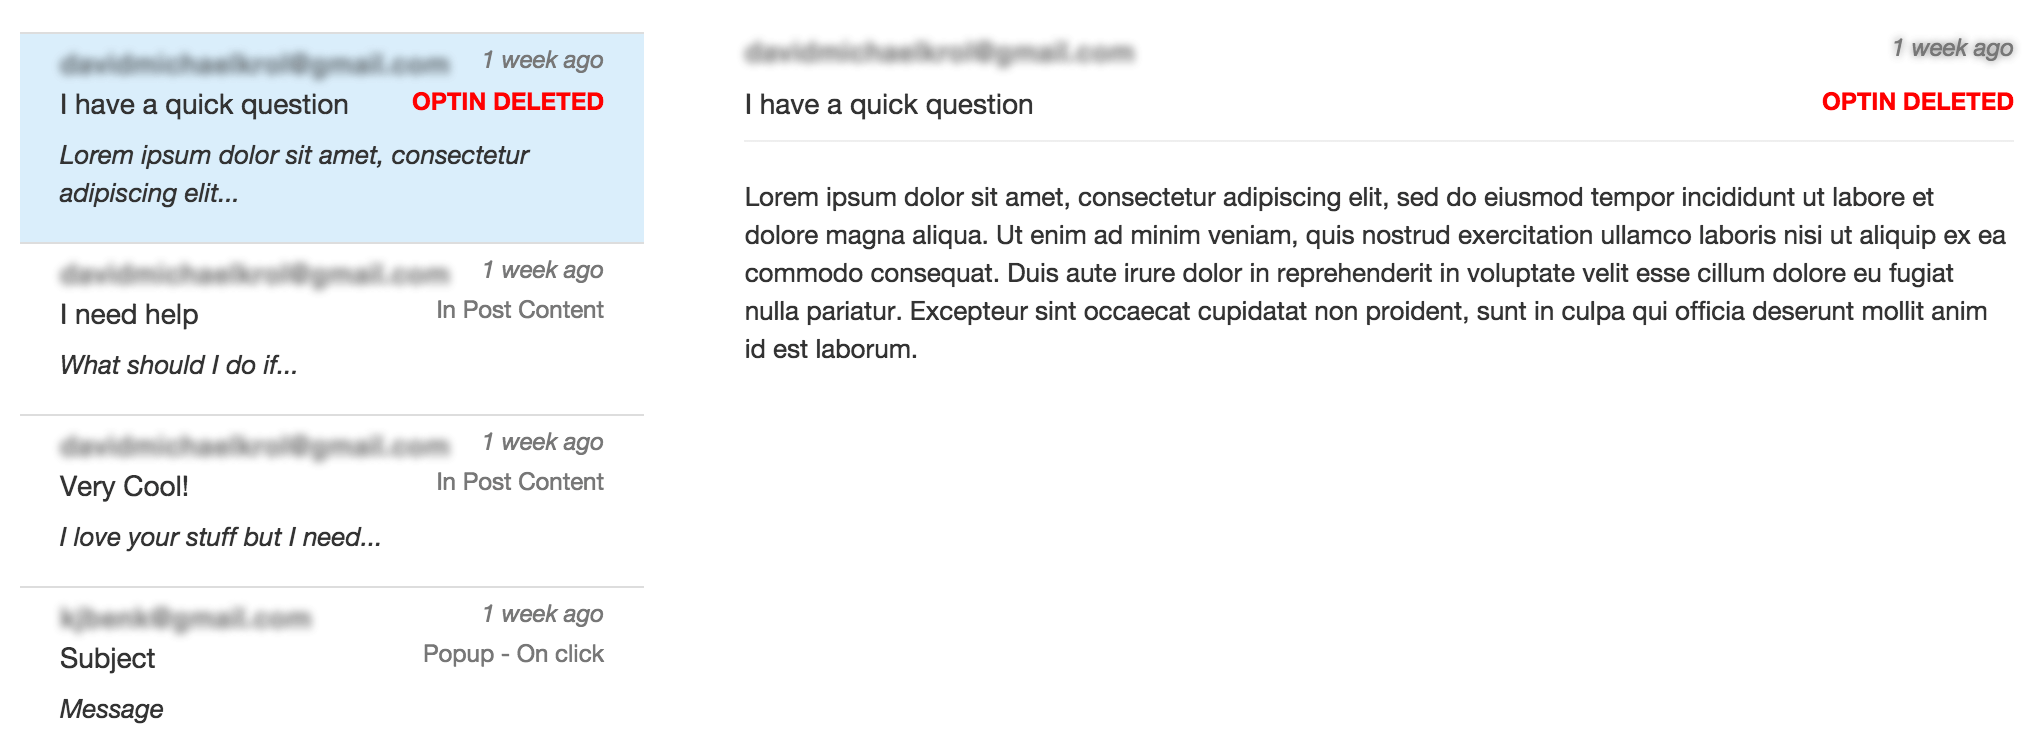
This section lets you view the information captured from the contact form. For example, here you can see the date, which Optin the form was completed on, the email of the visitor, subject of the visitor’s message, and the message itself.
Shortcode
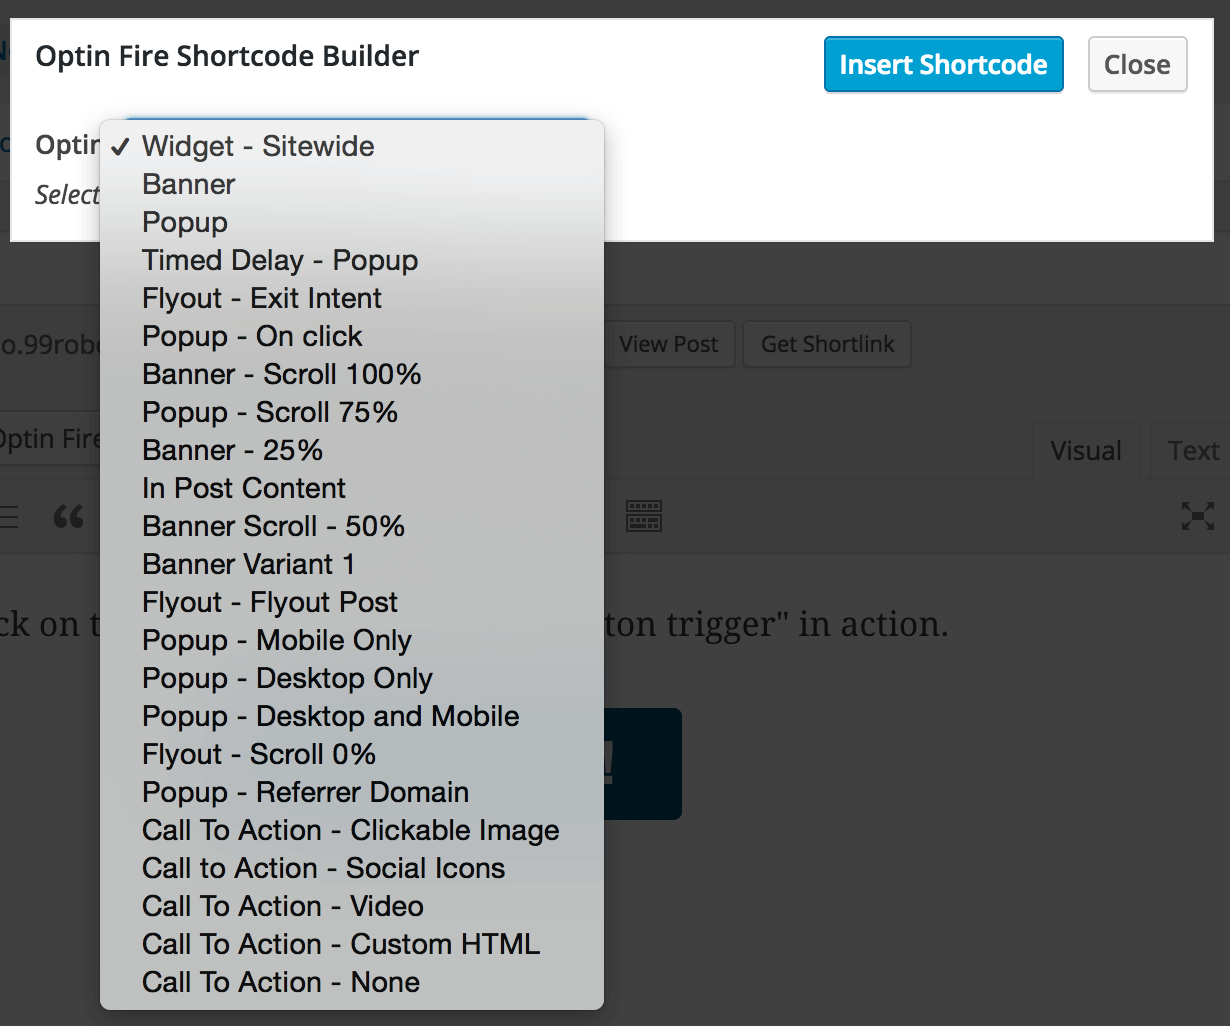
Optin has a shortcode to allow you to add any Optin into any post you want. You can do this be simply clicking on the Optin Fire Media button above the Visual Builder. You will be presented with the option to select which Optin you want to show. You can add an Optin into the post in two ways.
- Plain shortcode text

- Clickable shortcode

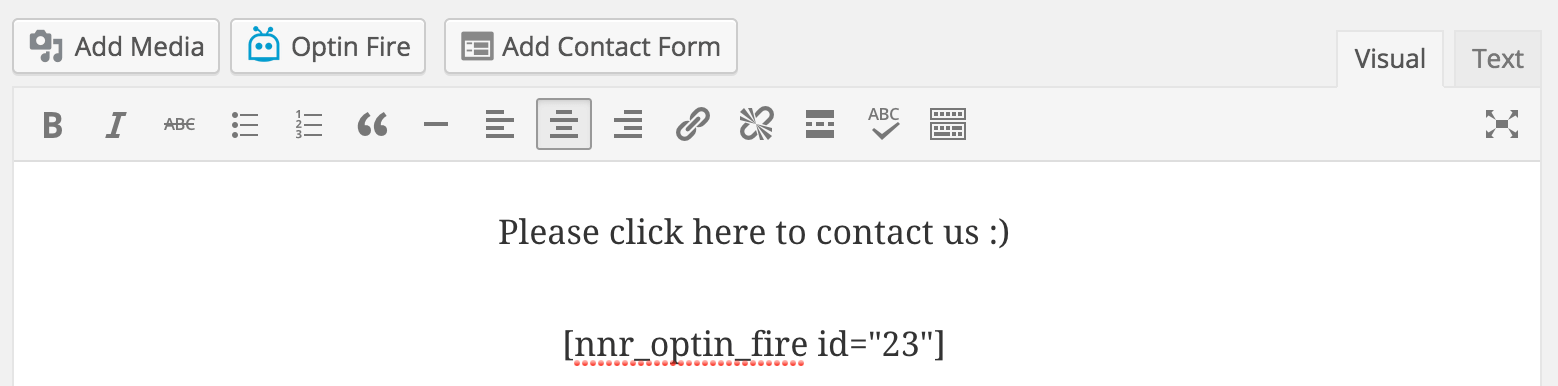

The plain text shortcode will show the Optin on that post with whatever triggers it has set, while the clickable shortcode wraps around existing text or images within you post and will display an Optin once a user clicks on that text or image.